How to Publish & Manage Blog Posts by Using WordPress MCP Plugin
A step-by-step guide to a WordPress MCP plugin. Set up WPVibe, connect Claude or ChatGPT, and publish and manage blog posts through chat.
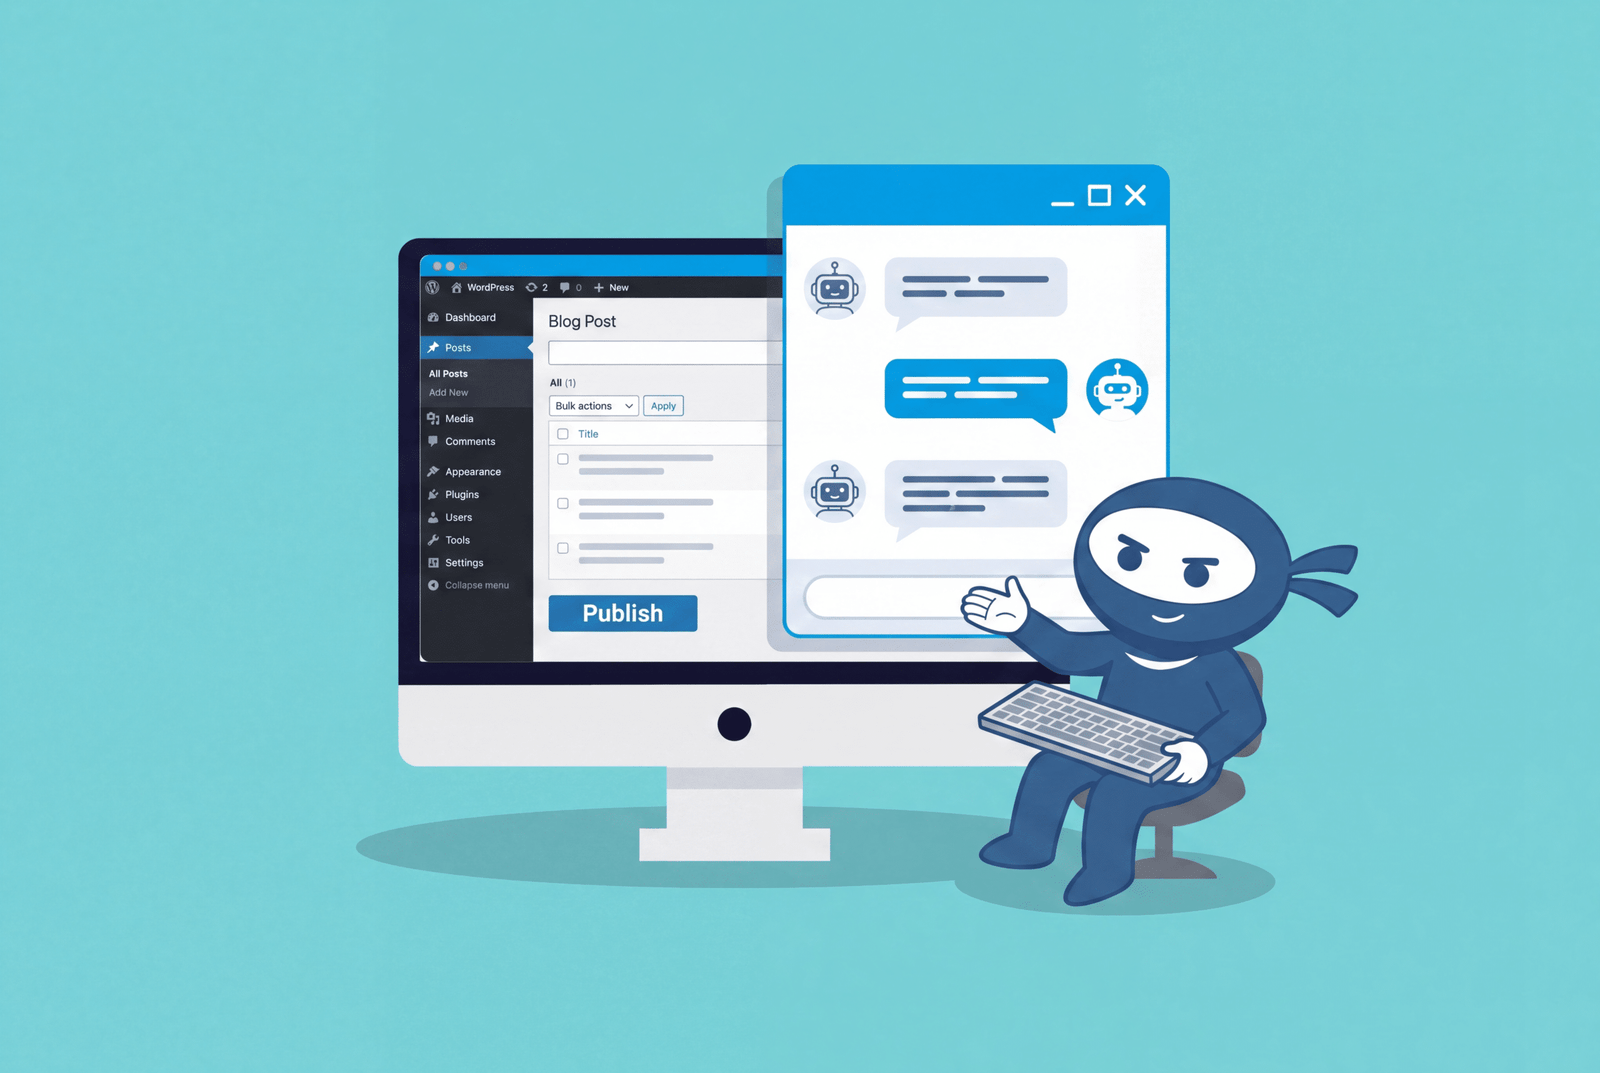
A WordPress MCP plugin lets you run your blog through conversation. Instead of opening the dashboard for every post, you tell an AI assistant what you want, and it makes the change on your site directly. “Draft a post about our new service and save it for review” becomes a finished draft, sitting in wp-admin, ready for you to check.
This guide walks through one plugin that does this, WPVibe, from install to publishing your first post. If you already use AI for content work, this fits alongside the other WordPress AI tools in your workflow.
Quick Summary
MCP, the Model Context Protocol, is an open standard that lets AI assistants talk to outside systems. A WordPress MCP plugin applies that standard to your site, so your AI client can create, edit, and publish posts through a single request.
WPVibe is a free plugin that handles this connection. You install it, add its server to your AI client, authorize your site with one click, and start managing content by chat. The rest of this guide shows each step.
What Is a WordPress MCP Plugin?
MCP stands for Model Context Protocol. Anthropic released it as an open standard for connecting AI models to outside tools and data. You can read the base spec on the Model Context Protocol documentation.
A WordPress MCP plugin is the piece that puts your site on the other end of that connection. It receives a request from your AI client, checks what your account is allowed to do, and carries out the action through the WordPress REST API.
The AI never touches your database directly. It works through defined actions, inside the same roles and permissions your site already uses. That boundary is what keeps the setup safe on a real site.
Benefits of Using a WordPress MCP Plugin
The main gain is time. A few specific ones stand out:
- No tab-switching. You stop copying text between your AI chat and wp-admin. The AI writes straight into your site.
- Faster publishing. Draft, edit, and schedule from one conversation instead of clicking through screens.
- Safer by default. New posts save as drafts, and deletes go to trash, so nothing goes live or disappears by accident.
- Works with the AI you already use. WPVibe connects to Claude, ChatGPT, Cursor, and other MCP clients, so you are not locked into one tool.
- No custom code to maintain. The plugin handles the connection, so you are not building and patching an integration yourself.
What WPVibe Does
WPVibe is a free WordPress MCP plugin download on WordPress.org, built by SeedProd. It packages the common WordPress jobs, content management, media uploads, category and tag handling, and REST API access as actions your AI client can call.
Once connected, your AI can draft and publish posts, edit existing content, upload images, and organize your library through plain requests. It supports WordPress MCP Claude setups as well as ChatGPT, Cursor, and Windsurf, all through the same server URL.
Worth knowing: WPVibe is a third-party plugin, not an official WordPress product. It connects through the WPVibe service to relay requests to your site over the protocol.
How to Set Up WPVibe: Step by Step
The whole setup runs about five minutes. Here is each step.
Step 1: Install the WPVibe Plugin
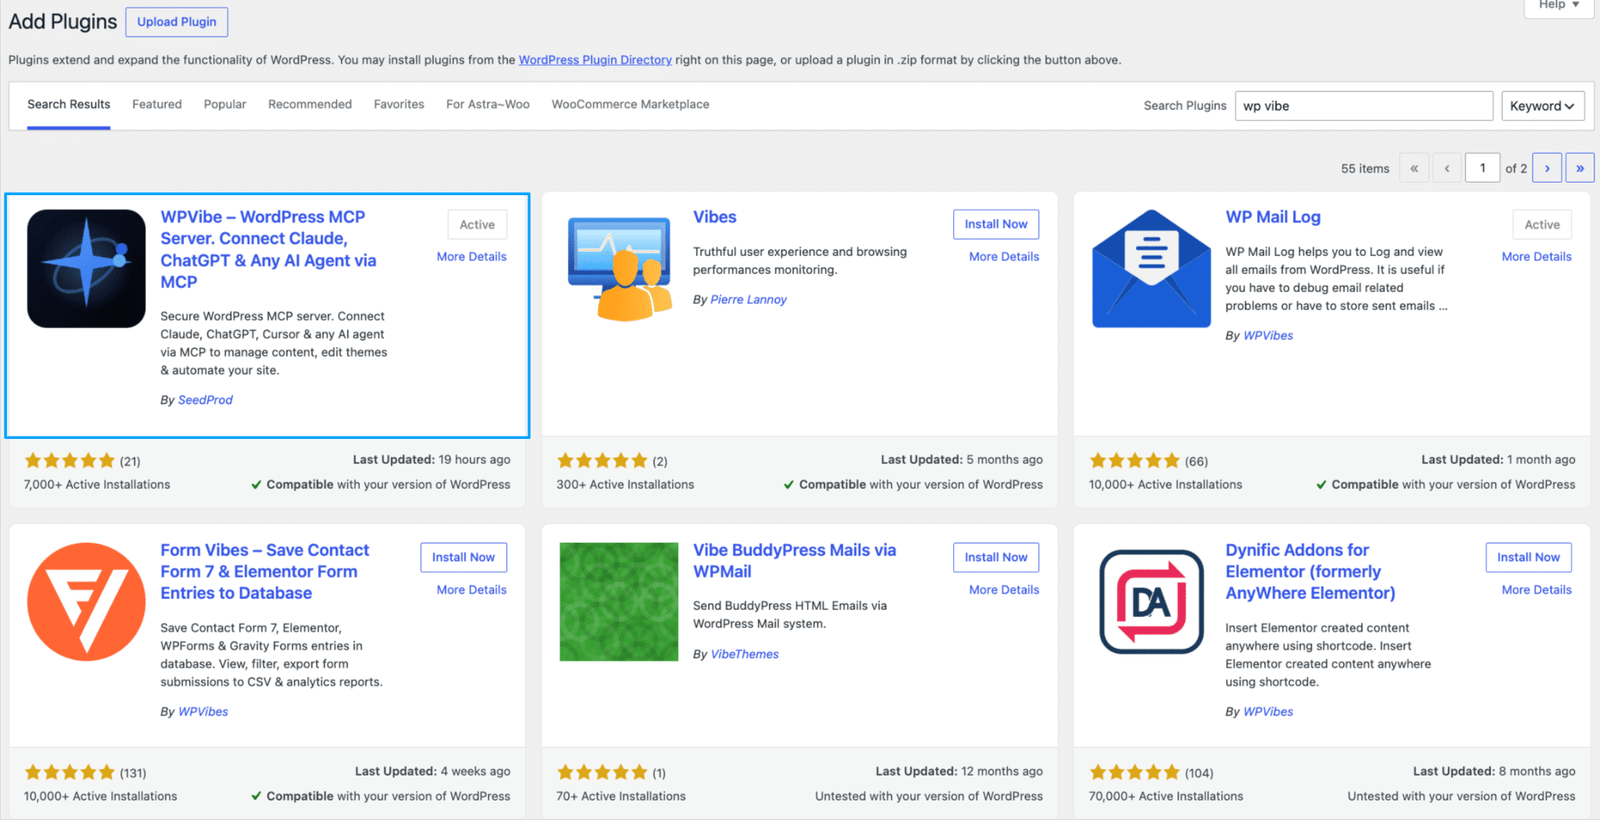
In your WordPress dashboard, go to Plugins > Add New Plugin, and search for WPVibe. Install and activate it. You can also download it from the plugin page and upload it manually.
Step 2: Open Your AI Client
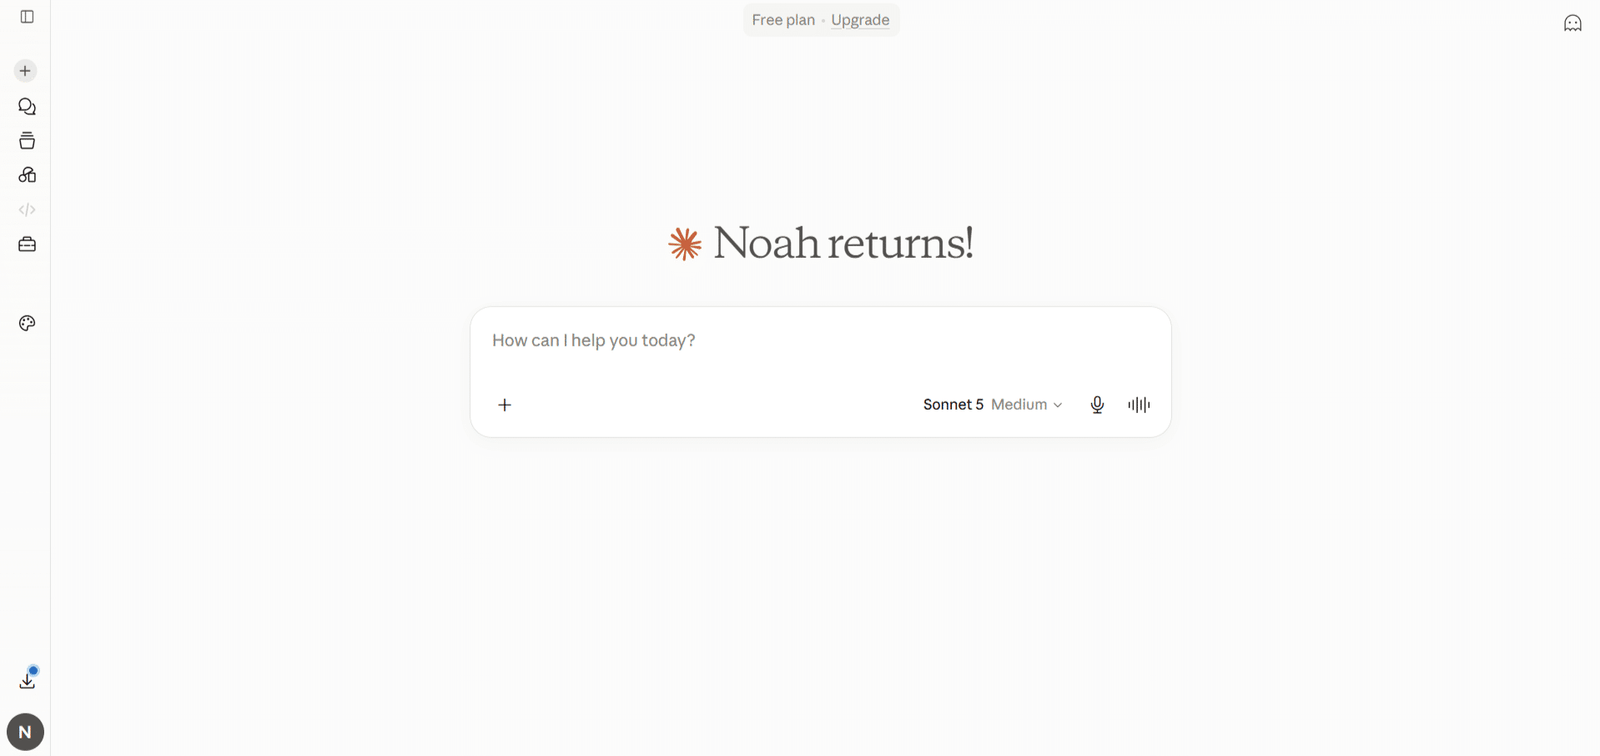
Open the AI client you want to connect to. This guide uses Claude, but the same steps apply to a WordPress MCP ChatGPT setup or any other MCP-compatible client.
Step 3: Open Connectors Settings
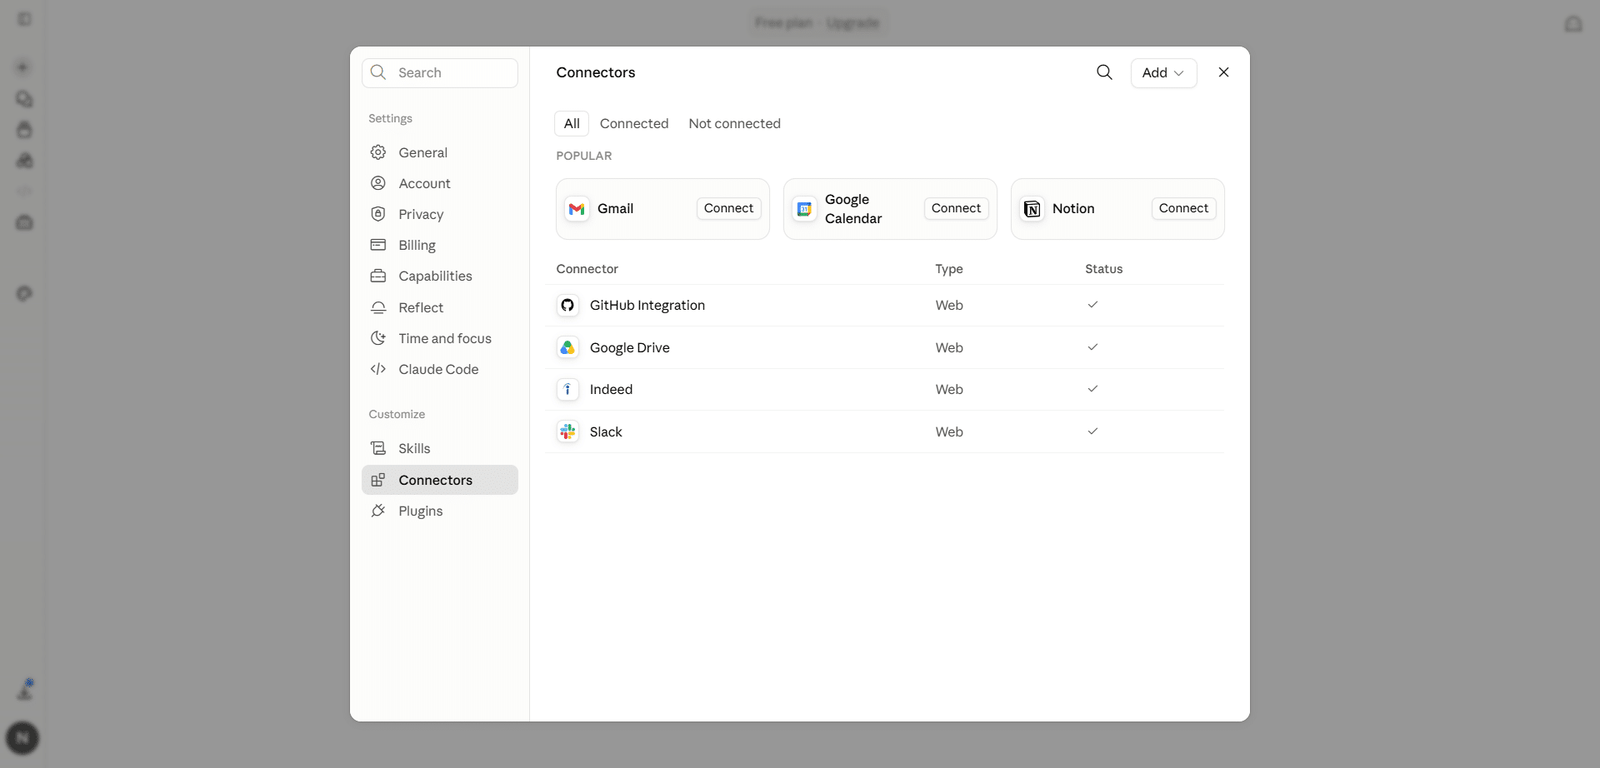
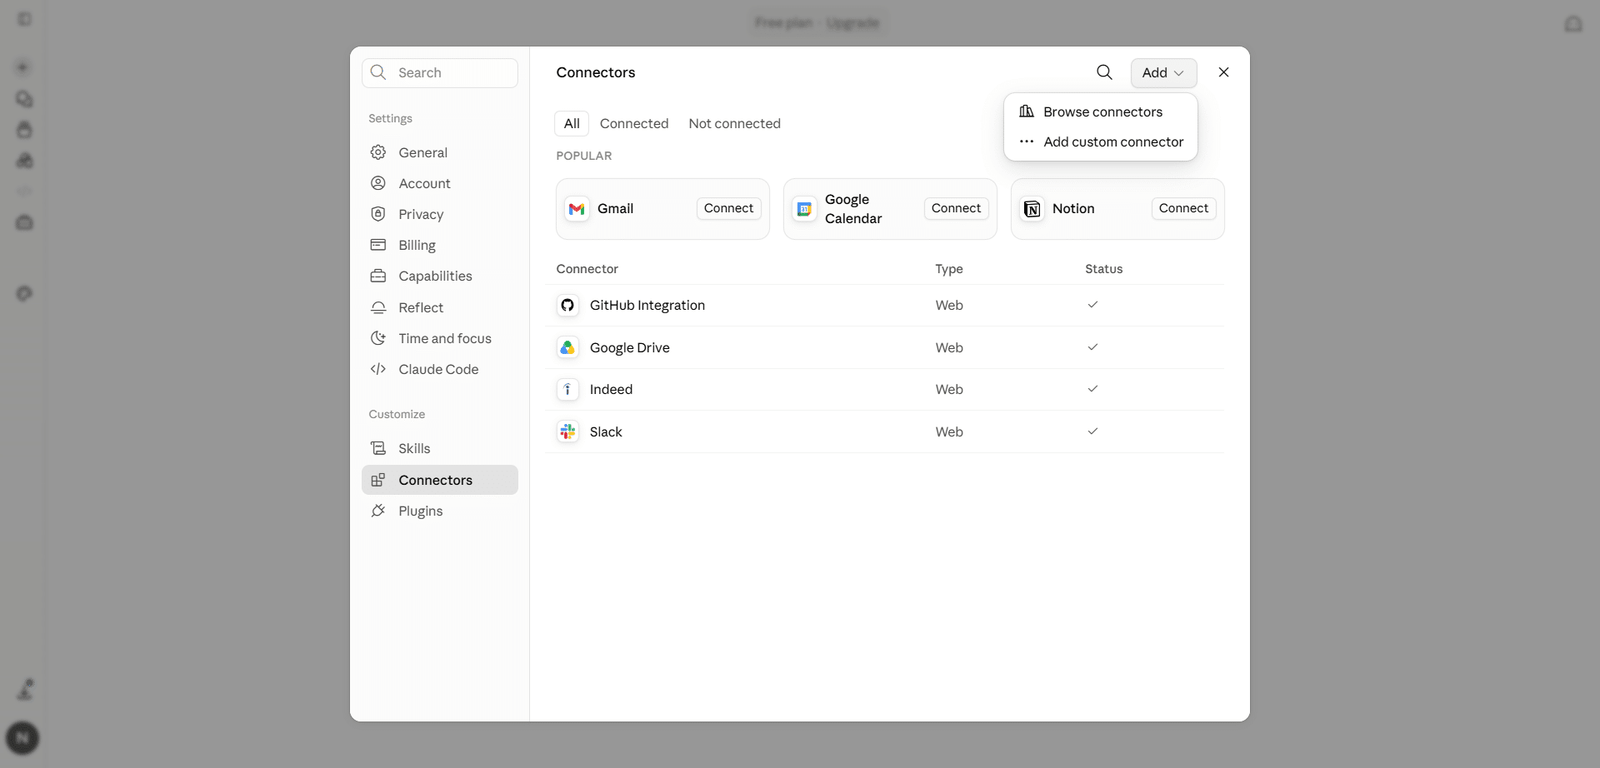
In Claude, open Settings > Connectors. This is where you add outside tools your AI can reach.
Step 4: Add WPVibe as a Custom Connector
Click Add, then Add custom connector. A dialog opens where you enter the connection details.
Step 5: Enter the WPVibe Server URL
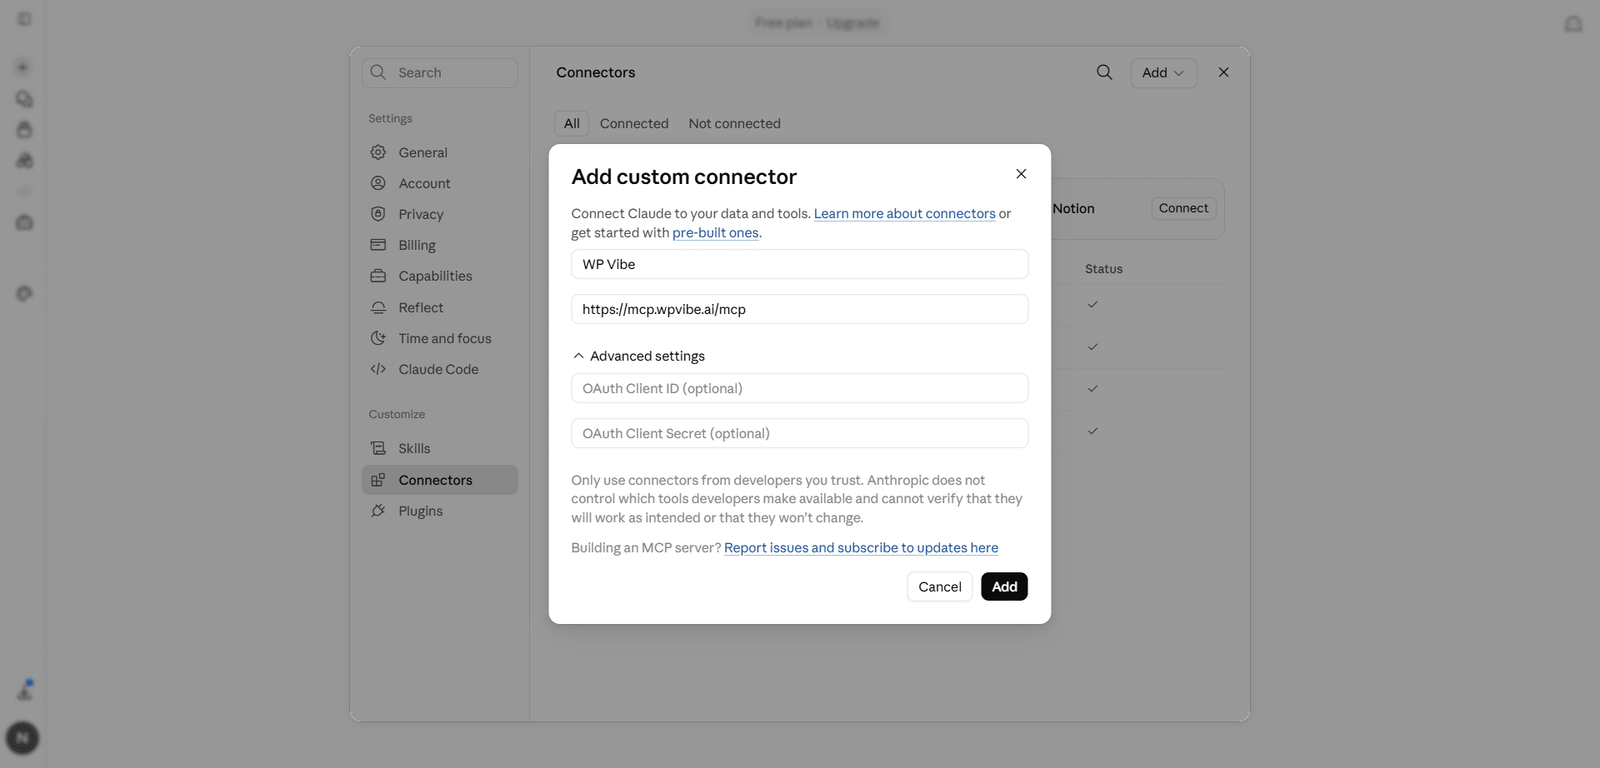
Give the connector a name, like WP Vibe, and paste in the WPVibe server URL. Save it. WPVibe’s own guide to connecting your first site covers this step in more detail if you get stuck.
Step 6: Sign In to WPVibe
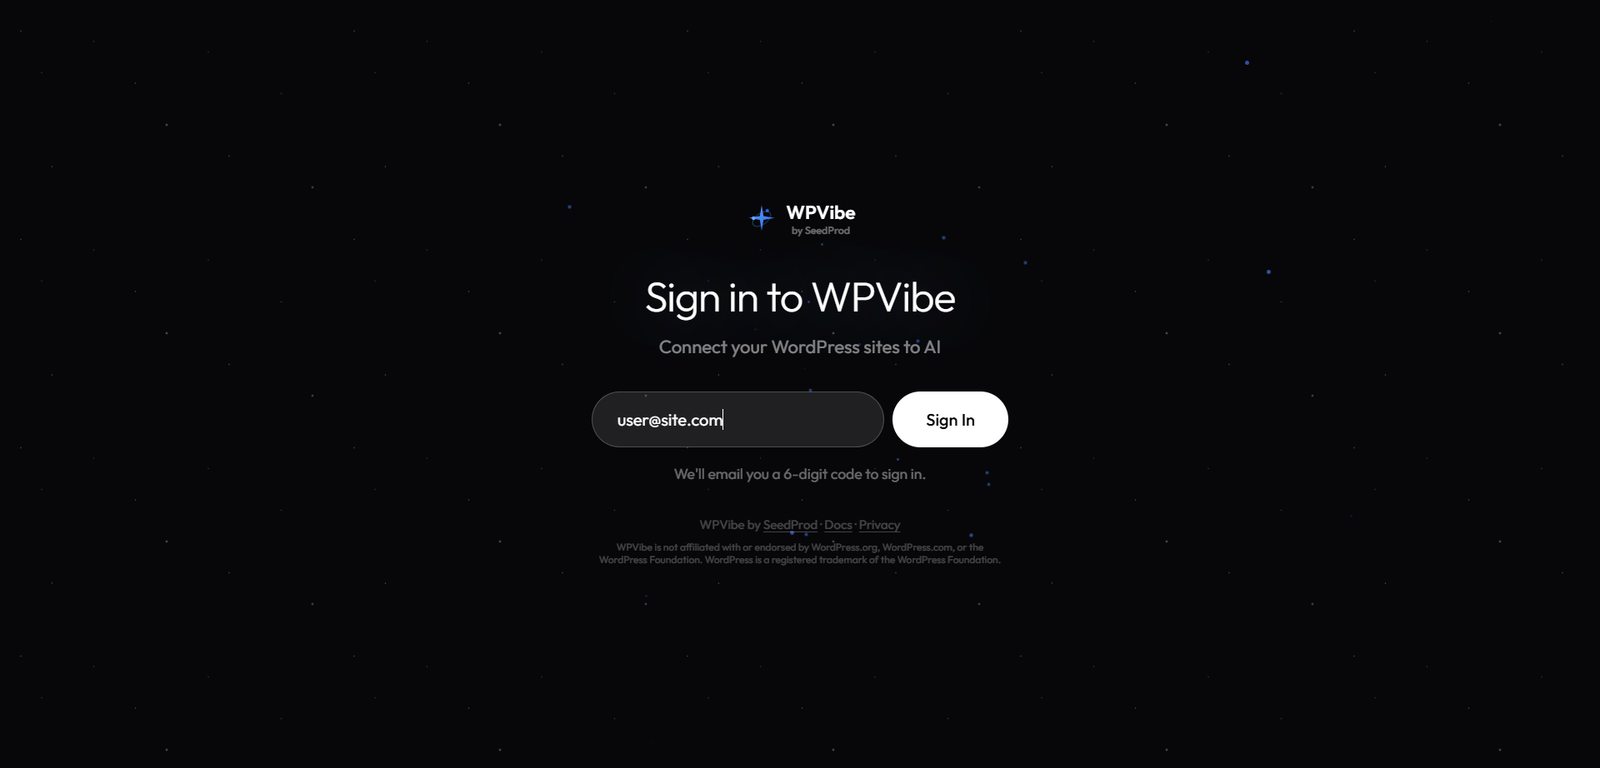
After you add the connector, WPVibe asks you to sign in with your email. This keeps your WordPress password out of the AI chat entirely.
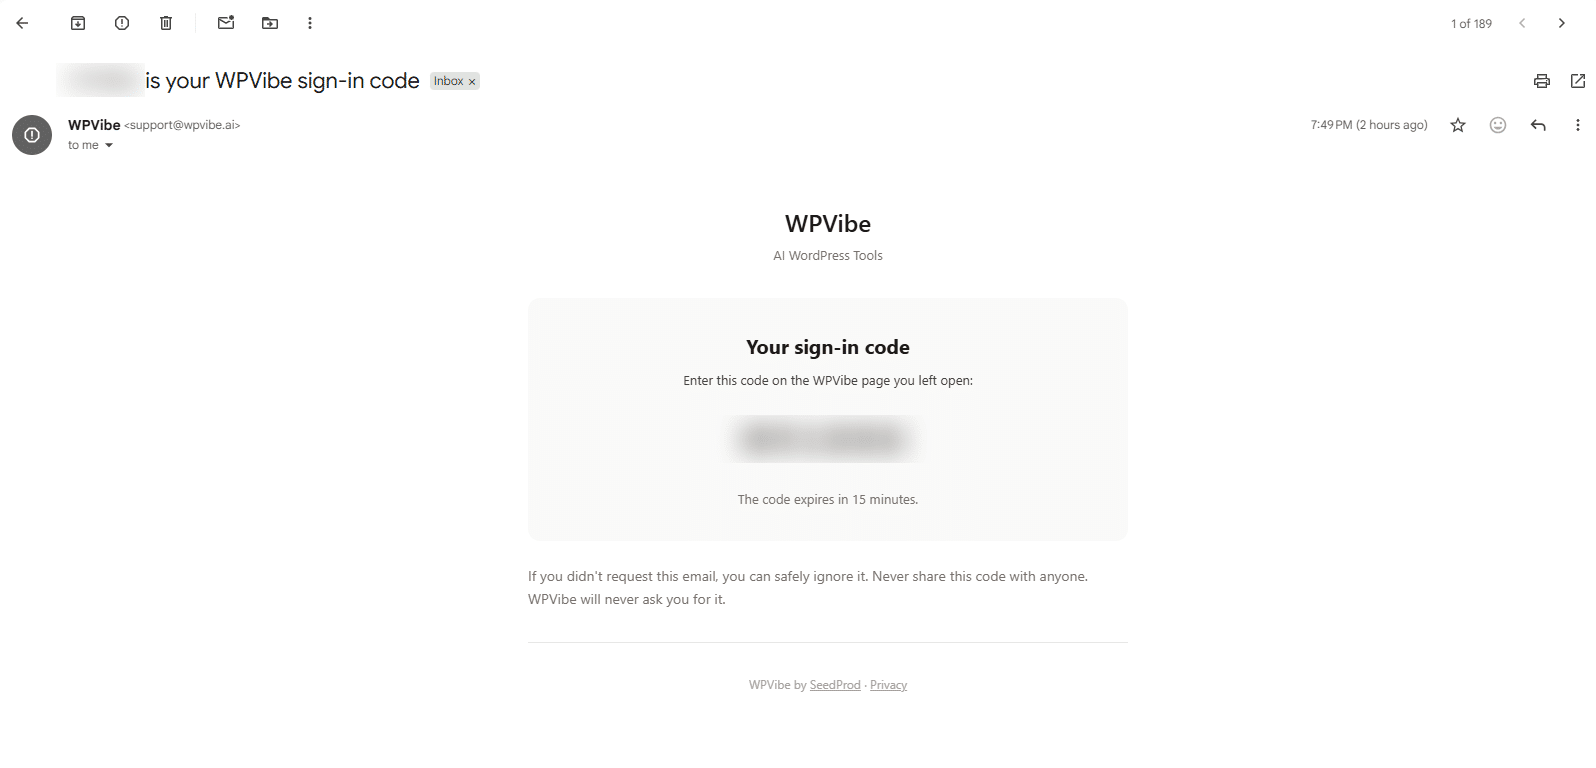
Step 7: Enter Your Verification Code
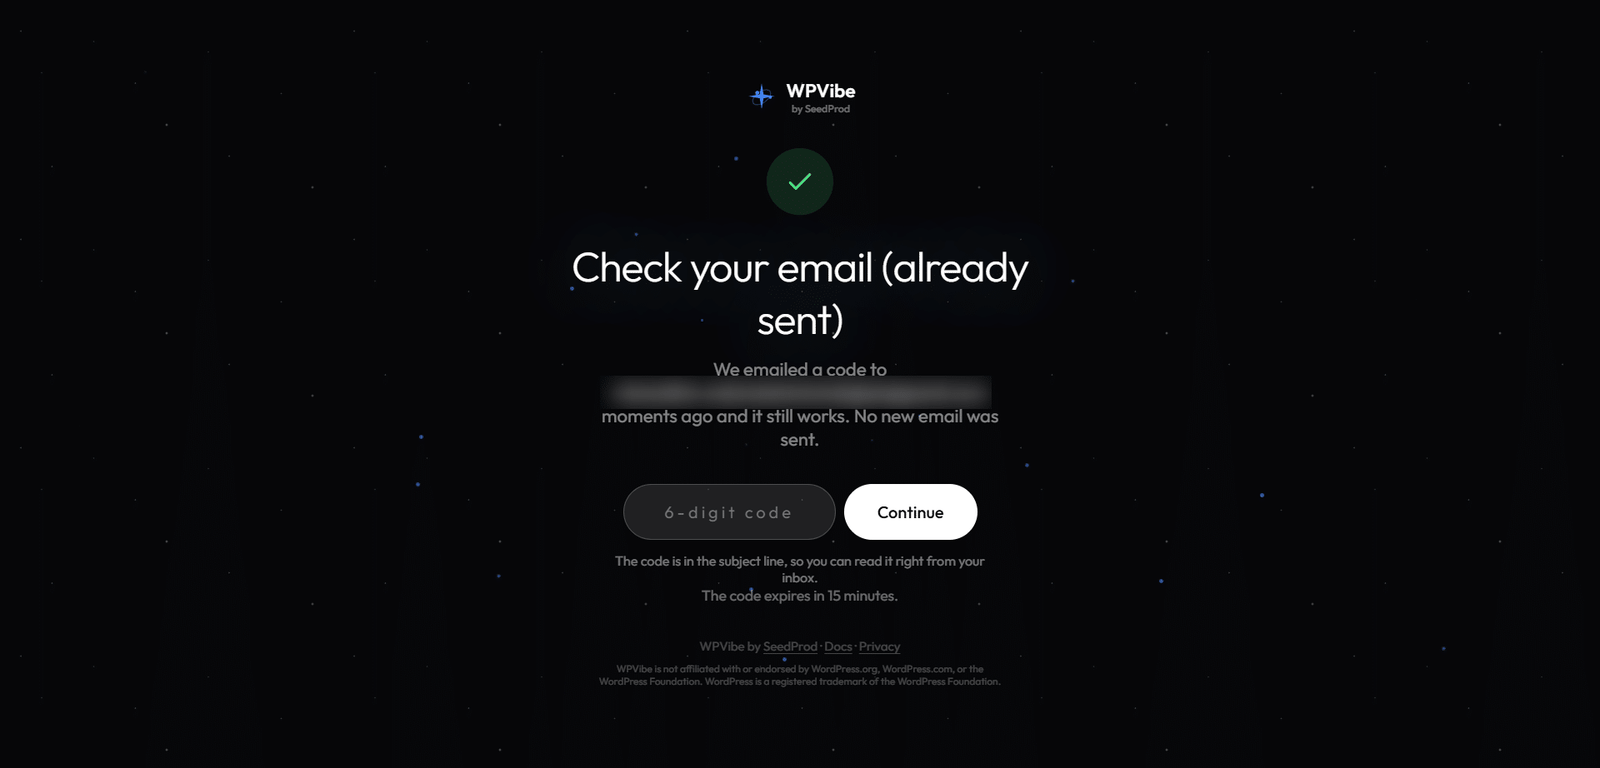
emails you a six-digit code. Enter it to confirm your account. The code sits in the email subject line, so you can read it without opening the message.
Looking for a Ready-Made Solution?
Explore our WordPress, WooCommerce, and LMS plugins built to extend functionality without custom development.
Step 8: Connect Your WordPress Site
Ask your AI to connect your site by its URL. WPVibe generates a one-click authorization link and sends it back in the chat.
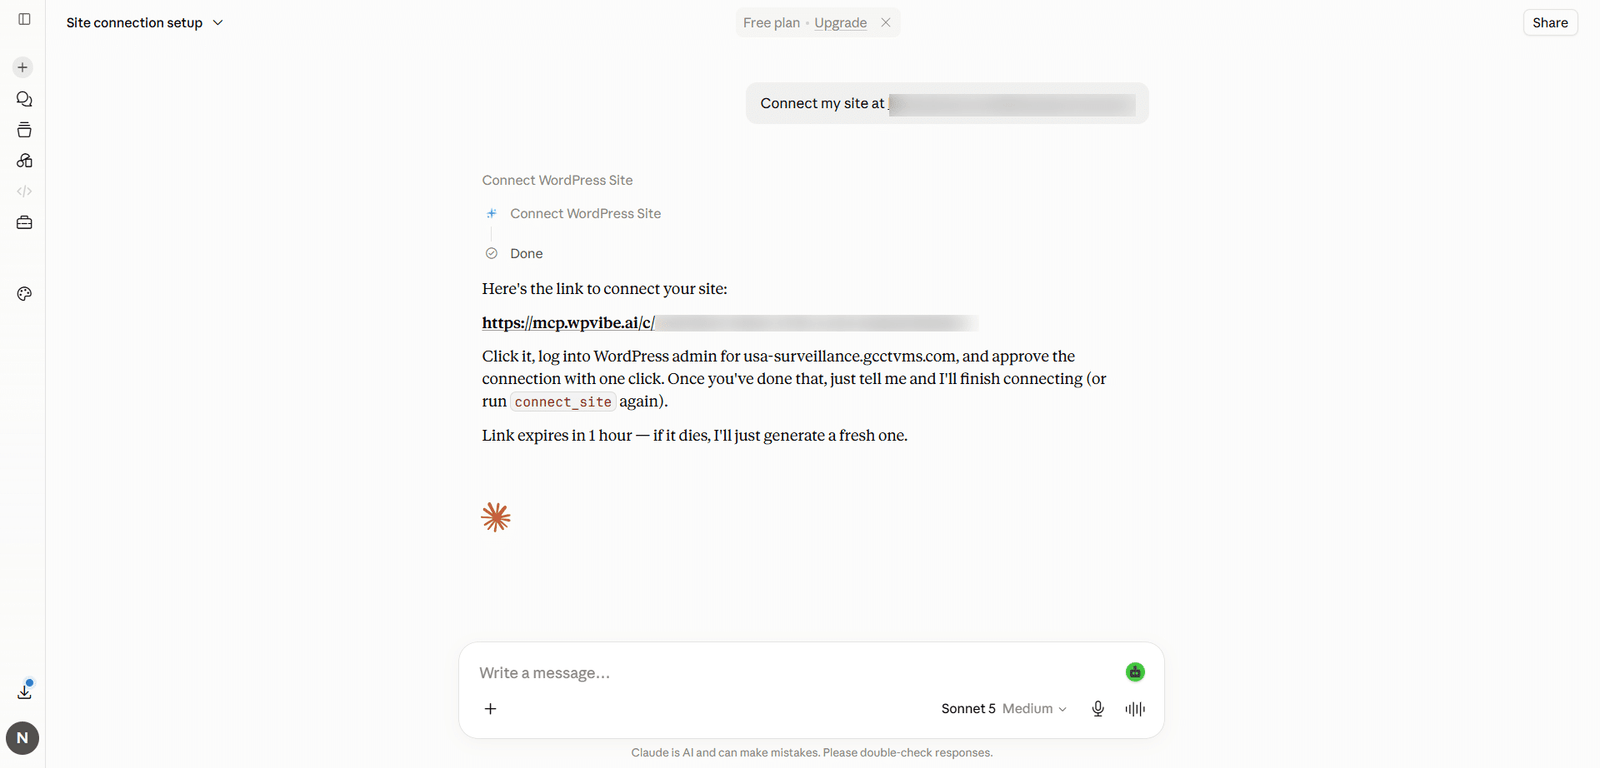
Step 9: Approve the Connection in wp-admin
Open the link, log into your WordPress admin, and approve the connection with one click. Go back to your AI, ask it to verify, and it confirms the site is connected and reports what it can access.
How to Publish a Blog Post with a WordPress MCP Plugin
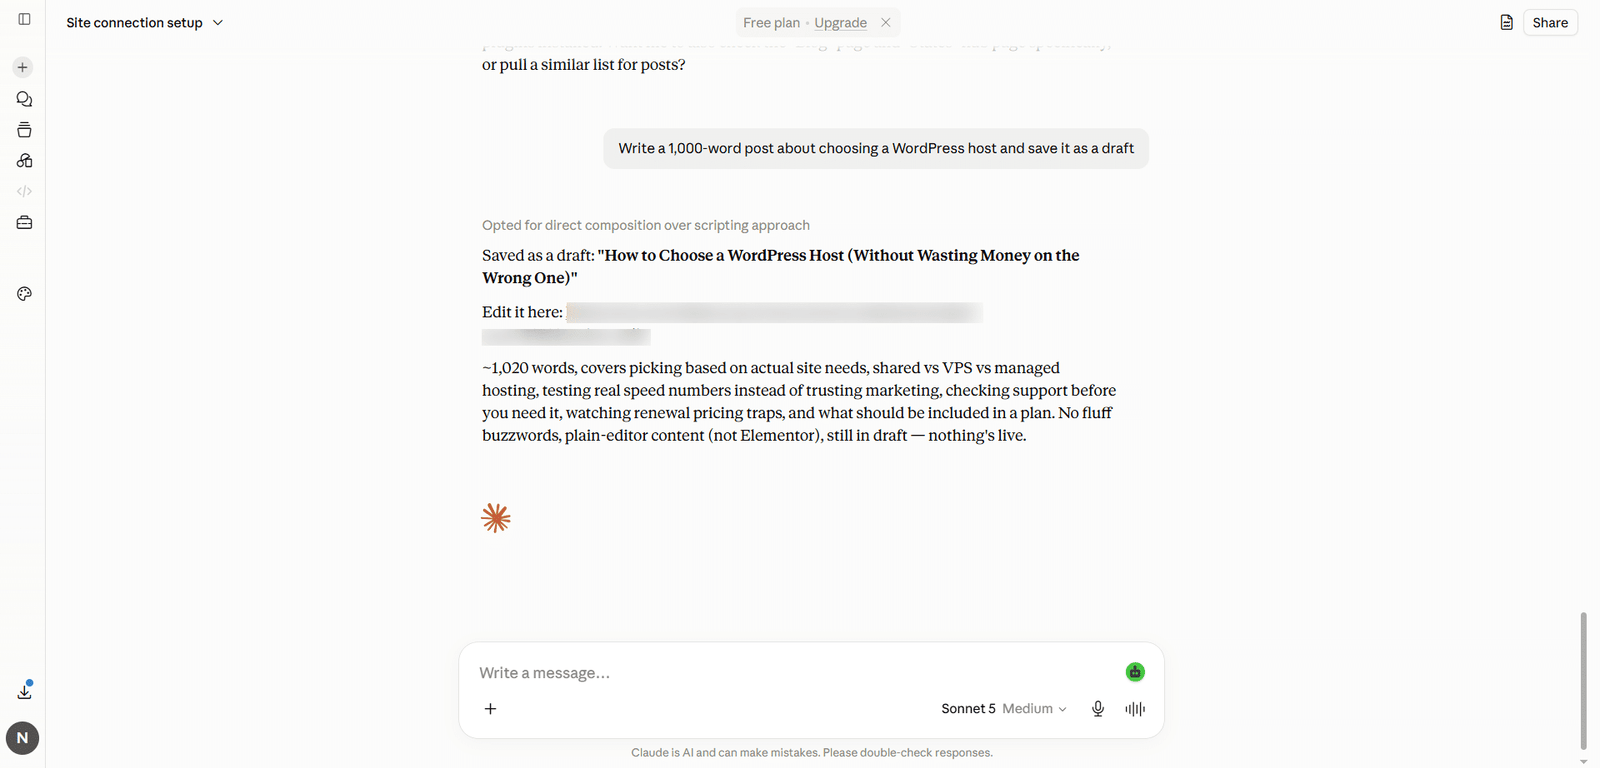
With the WordPress MCP plugin connected, publishing is a conversation. A request like “Write a 1,000-word post about choosing a WordPress host and save it as a draft” creates the draft on your site.
New posts save as drafts by default, so nothing goes live until you say so. Review the draft in wp-admin, make any edits, then tell your AI to publish it by title. That is the point where the post goes public.
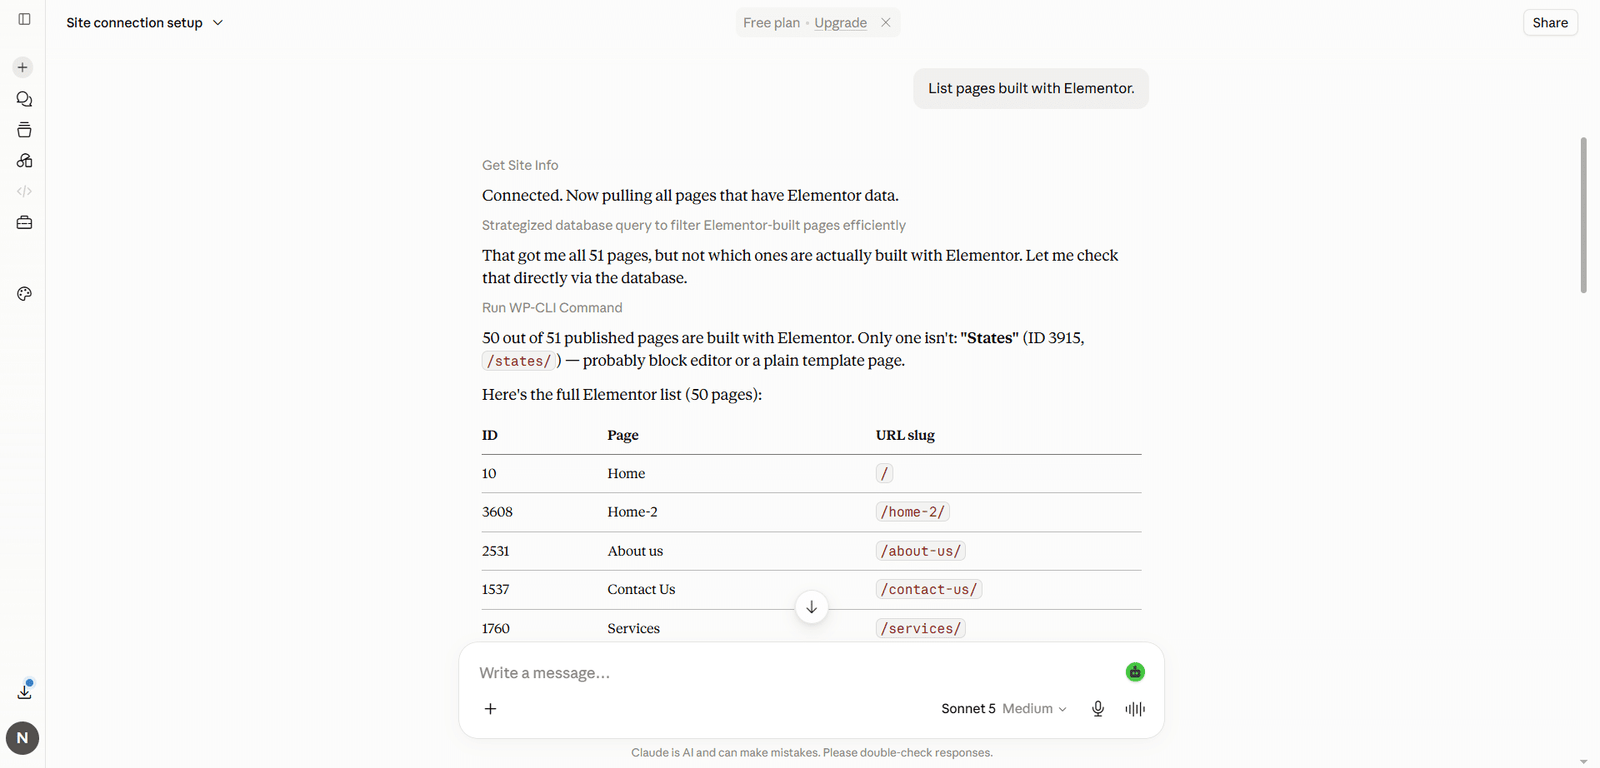
This is also where the connection proves itself. Ask your AI to list your pages or pull a recent post, and it reads straight from your site, which confirms everything is wired correctly. If you write with ChatGPT elsewhere, the same setup works with WordPress ChatGPT workflows too.
How to Manage Existing Content
Publishing is only half of it. The same connection handles ongoing edits.
Ask your AI to pull up a post and rewrite the intro, add an FAQ section, or swap the conclusion. It finds the post, makes the change, and reports back. The same works for pages, so updating an About or Services page is a single request. This is where the managed post with the WordPress MCP workflow saves the most time, since routine edits stop being a trip through the editor.
More Things WPVibe Can Do
Beyond posts and pages, this WordPress MCP plugin covers the surrounding work:
- Media uploads. Add images from your computer, or have the AI pull one from a URL into your media library.
- Categories and tags. Assign, rename, or reorganize your taxonomy through chat.
- Content search. Find a post by topic or keyword before editing it.
- Bulk tasks. Review every draft, or apply a change across several posts at once.
For anything more custom, like tying the connection into a specific workflow, that moves into plugin development territory rather than a standard install.
Security and Safety Features
Giving an AI write access to your site calls for real guardrails, and WPVibe builds several in.
Authentication runs through WordPress Application Passwords, a credential separate from your login that you can revoke in one click. Every action respects your user role, so the AI can only do what your account can. New posts default to draft, deletes go to trash, and anything destructive, like removing a user or a bulk database change, pauses for an approval panel with a preview before it runs. Every sensitive action is recorded in an approval log in your admin.
These are the same protections a careful setup would build by hand, which is worth keeping in mind alongside your wider WordPress security practices.
Key Takeaways
- A WordPress MCP plugin lets an AI client publish, edit, and manage posts through plain requests.
- WPVibe is a free plugin that handles the connection, and setup takes about five minutes.
- Most of the setup happens in your AI client’s connector settings, not in code.
- The plugin works with Claude, ChatGPT, Cursor, and other MCP clients through one server URL.
- Drafts-by-default, approval prompts, and an audit log keep you in control of your live site.
Conclusion
WordPress MCP turns publishing and content management into something you type a request to do, not something you click through menus to do. It’s the same setup where it matters: generate an application password, connect a server, link your AI client, and test before you depend on it. Once it’s live, running your blog isn’t about keeping up with the dashboard, it’s a conversation.
It gets more complicated when you need to pick the right server, scope permissions correctly, and maintain security, especially across client sites or at scale. If you’re struggling to automate tasks with your WordPress MCP setup, contact us, and we’ll help you build a smoother, safer workflow.
Related Guides
- How to Publish & Manage Blog Posts on WordPress Using MCP
- Managing WooCommerce Products with MCP: Add, Update & Sync
- MCP for Real Estate Websites: Auto-Manage Property Listings
- MCP for Restaurants: Keep Your WordPress Menu Updated with AI
FAQs
Does WordPress support MCP?
WordPress does not ship MCP support in core in a plug-and-play form, but plugins add it. A WordPress MCP plugin like WPVibe connects your site to AI clients through the Model Context Protocol, and WordPress 6.9 added an Abilities API that these tools build on.
How do I publish a blog post on WordPress using a WordPress MCP plugin?
Connect the plugin to your AI client, then ask it to write and save a post. It creates a draft on your site by default. Review the draft in wp-admin, then tell your AI to publish it by title.
Is WPVibe free?
The plugin is free on WordPress.org, and the WPVibe service has a free plan with a daily allowance of actions. You bring your own AI client, so it works with the free plans of Claude and ChatGPT. Paid plans raise the daily action allowance.
Can I connect ChatGPT or only Claude on WPVibe?
Both, and more. WPVibe works with any MCP-compatible client, including Claude, ChatGPT, Cursor, and Windsurf, through the same server URL. You are not tied to one AI tool.
Is it safe to give an AI plugin access to my WordPress site?
It can be, with the right setup. WPVibe uses WP Application Passwords, respects your user role, saves new posts as drafts, sends deletes to trash, and pauses destructive actions for your approval. Testing on a staging site first adds another layer of safety.
Need Ongoing WordPress Maintenance & Support?
We handle updates, performance monitoring, security hardening, and technical fixes so your WordPress and WooCommerce site stays stable and secure.
Plugin Not Working in WordPress? Here’s Why
Is your plugin not working in WordPress? Here are the 7 most common causes and fixes for plugin conflicts, errors,…
Read More...
WordPress SEO Consultant, Freelancer, or Agency: What Each Costs
Hiring SEO help gets expensive fast. See what an SEO consultant, freelancer, or agency really costs before picking one for…
Read More...
AEO vs. SEO: How to Get Your WordPress Site Cited in AI Answers
AEO vs. SEO explained in simple terms, plus the schema, content, and site fixes that help your WordPress site show…
Read More...
