With the Tutor LMS Course Import/Export add-on, creating, updating, migrating, and backing up course content has never been this easy! Export courses into a .xls or .xlsx file with a single click. Plus, create and edit courses, lessons, and topics directly from a simple template, and import them into any TutorLMS site in a matter of minutes.
Below, you’ll find the instructions you need to follow to install, configure, and import/export courses with this add-on.
Video Tutorial
Watch the tutorial video below for a quick walkthrough of the add-on’s features and setup process.
For detailed instructions, please continue reading the full documentation. If you still have any questions, feel free to submit a support ticket.
- Video Tutorial
- Installation
- Activate Your License Key
- Export Single Course
- Export Multiple Courses
- Import Single Course
- Import Multiple Courses
- Settings
- Important
- Blocks
- TutorLMS Course Import/Export Template Guide (.xls, .xlsx files)
- “Course” Sheet
- Type
- Status
- Publish Date
- Password
- Title
- Content
- Category
- Tag
- Sale Price
- Price
- Product ID
- Monetize By
- Certificate Template
- Attachments
- Prerequisites IDs
- Course Image
- Public Course
- Course Level
- Course Duration
- Maximum Students
- Enrollment Expiry
- Enable Question & Answers
- Course Material Includes
- Course Target Audience
- Course Requirements
- Course Benefits
- Course Video
- “Topics” Sheet
- “Lessons” Sheet
- “Course” Sheet
- TutorLMS Course Import/Export Template Guide (.docx file)
- FAQ's
- Changelogs
Installation
- Install the TutorLMS plugin & activate it.
- Install TutorLMS Course Import/Export and activate it.
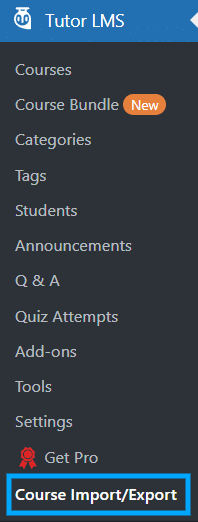
- A new “Course Import/ Export” menu will appear under the TutorLMS menu.
Activate Your License Key
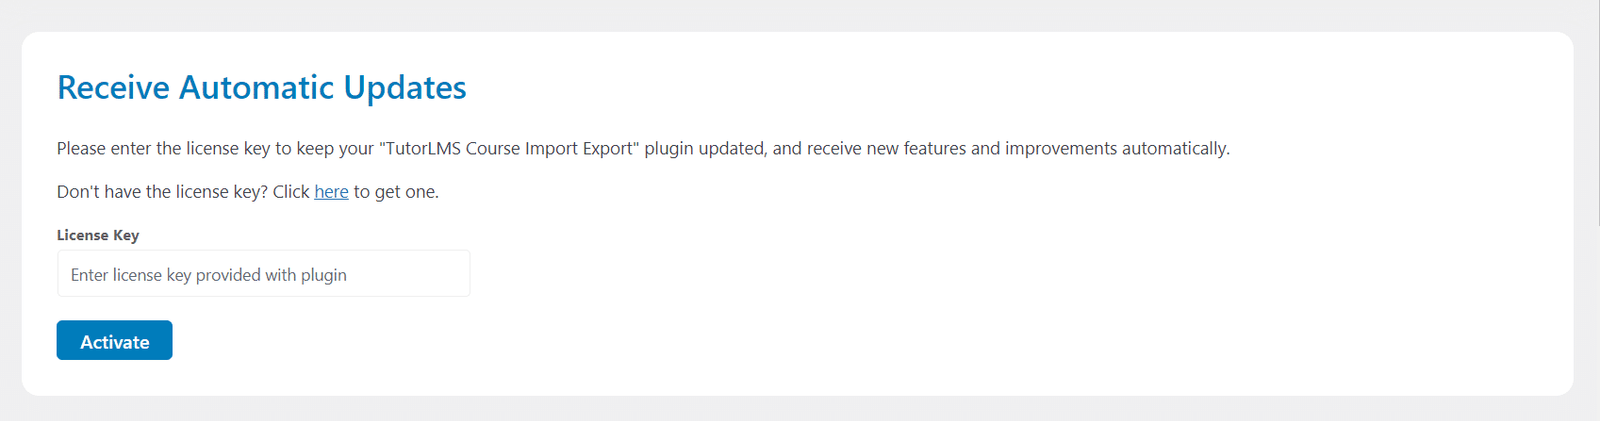
The license key can be configured on the License tab in the main Course Import/Export menu. License keys will be sent to your email address when you purchase the add-on.
Insert your license key in the field and then click on Activate.
Export Single Course
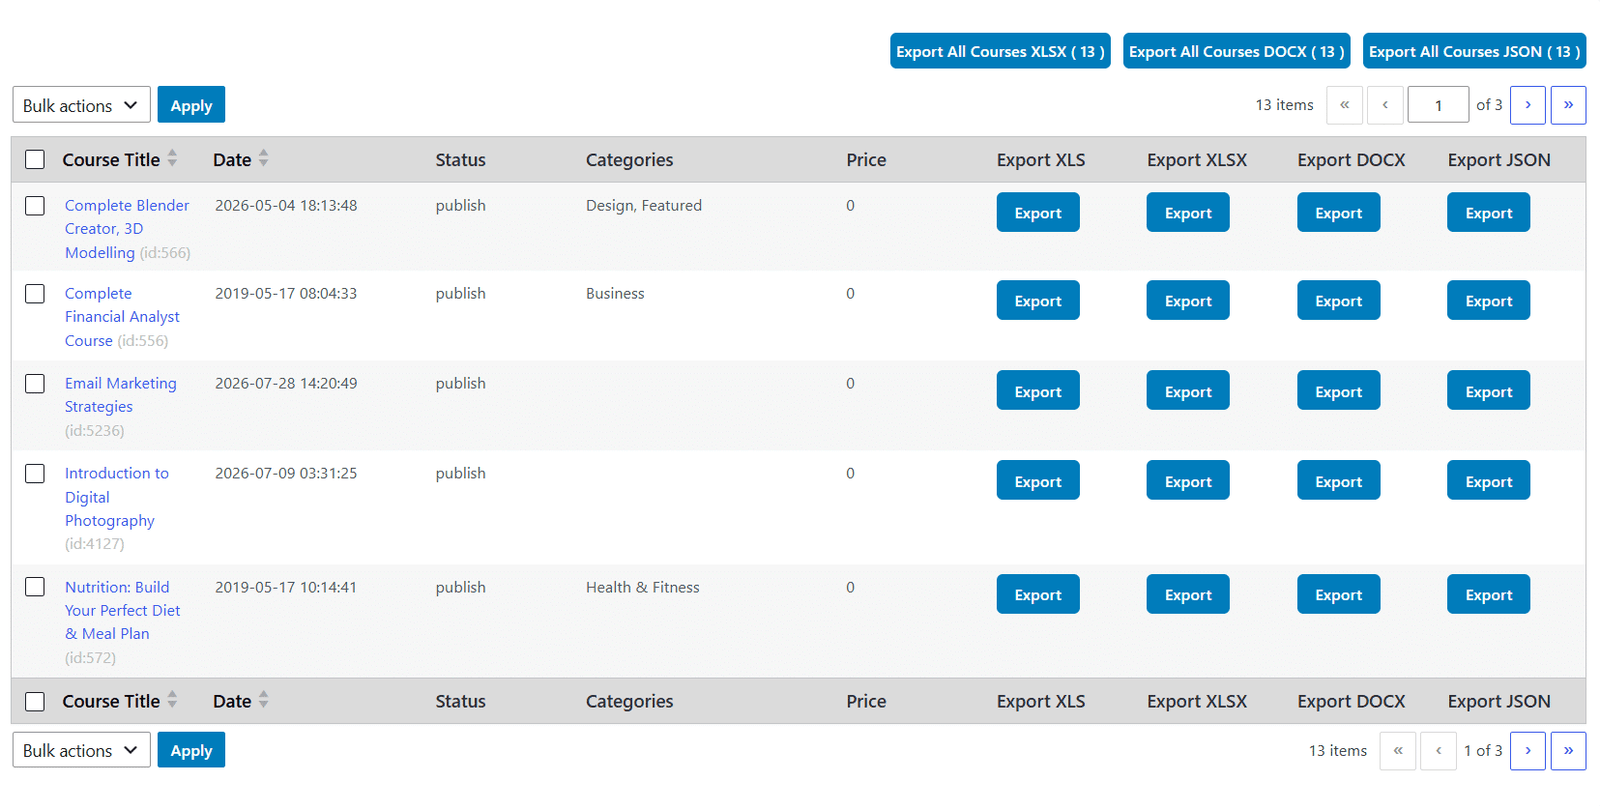
Select “Course import/export” from the TutorLMS menu. Within the “Export Courses” tab, the export buttons will appear in the courses table, under the “Export XLS”, “Export XLSX” and “Export DOCX” columns.
To export a course, simply click on the export button. The course will be downloaded as an .xls, .xlsx, .json or .docx file. In case of .xls, .xlsx or .json files, both course content and course settings will be exported to a file and can be imported into another TutorLMS site using this add-on. In case of a .docx file, only the course content will be exported to a file and can be imported into another TutorLMS site using this add-on.
Docx file content includes the following information related to the course:
- Course’s Name
- Course’s Featured Image
- Course’s Description
- Course’s Intro Video Link
- Topic’s Name
- Topic’s Summary
- Lesson’s Name
- Lesson’s Featured Image
- Lesson’s Content
- Lesson’s Video Link
Export Multiple Courses
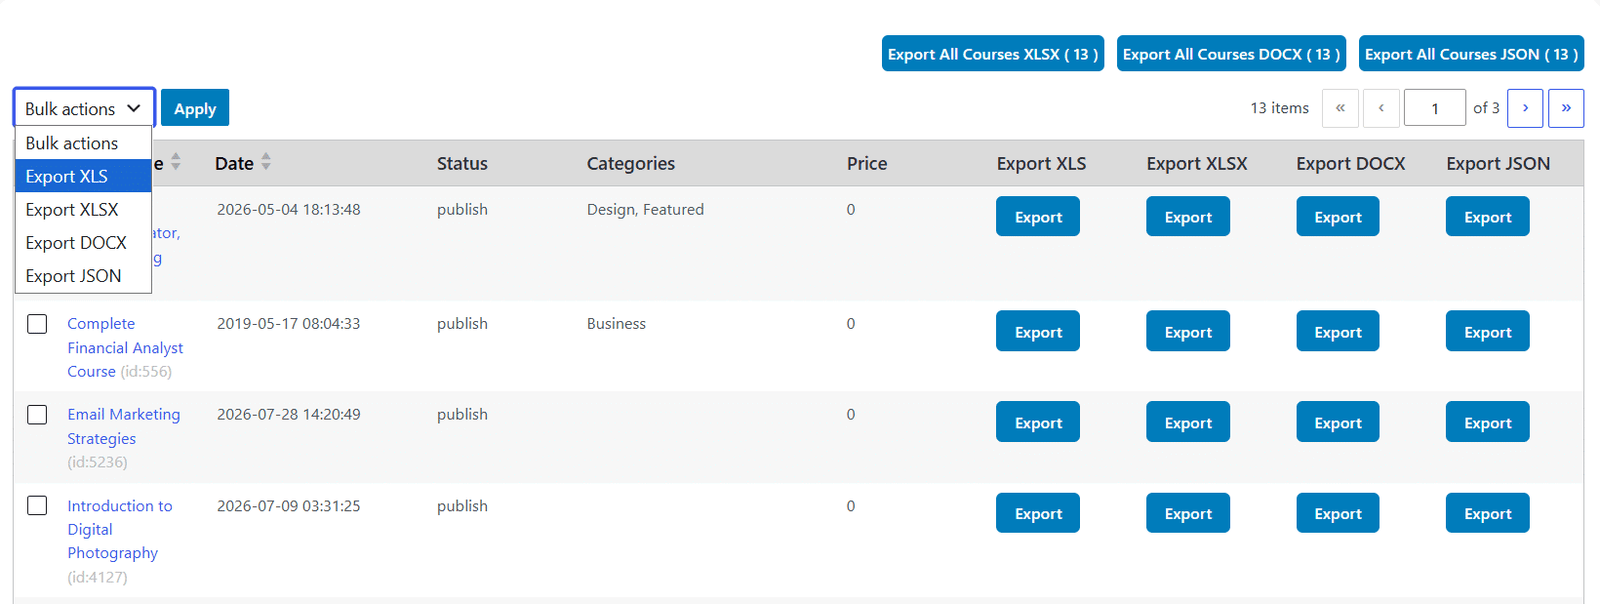
To export multiple courses into a single file, simply select the courses you want to export and then select the “Export XLS”, “Export XLSX ”, “Export DOCX ” or “Export JSON” options from the “Bulk Actions” field.
Complete courses, including course content and settings, will be downloaded as an .xls, .xlsx or .json file, which can be imported to another TutorLMS site using this add-on. In case of “Export DOCX ”, a .zip file will be downloaded containing multiple .docx files of all individual courses. These individual .docx file will contain course content only.
Import Single Course
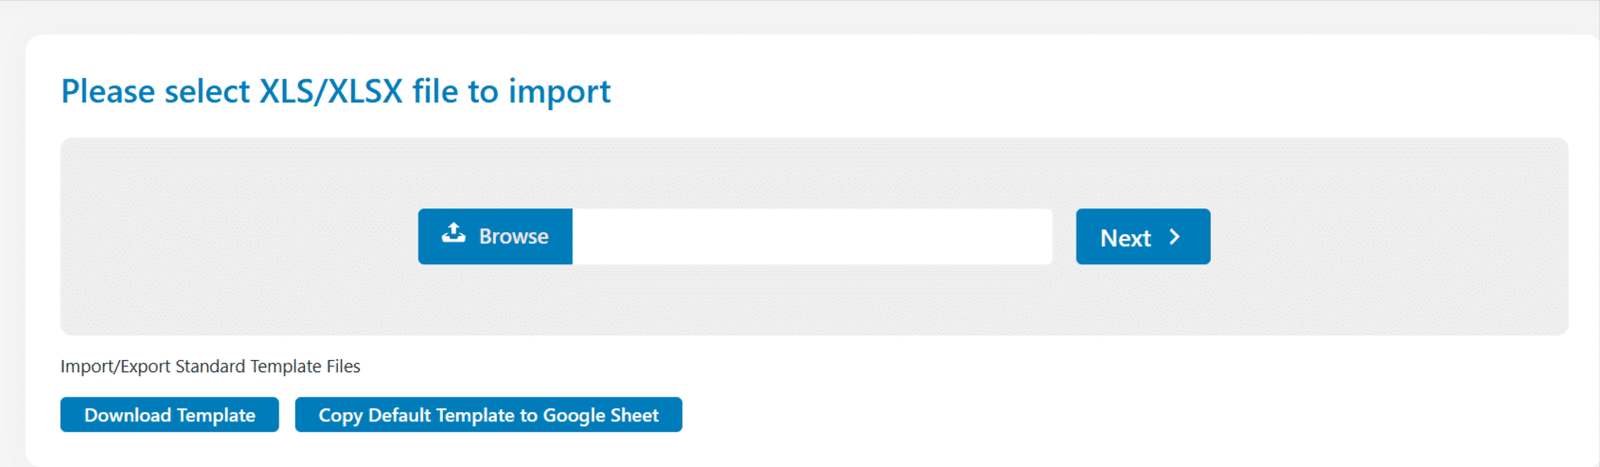
To import a course from a spreadsheet, navigate to the “Import Courses” tab from the Course Import/Export menu located under the main TutorLMS menu. To complete the import, select the completed template’s .xls or .xlsx file and click on the Next button.
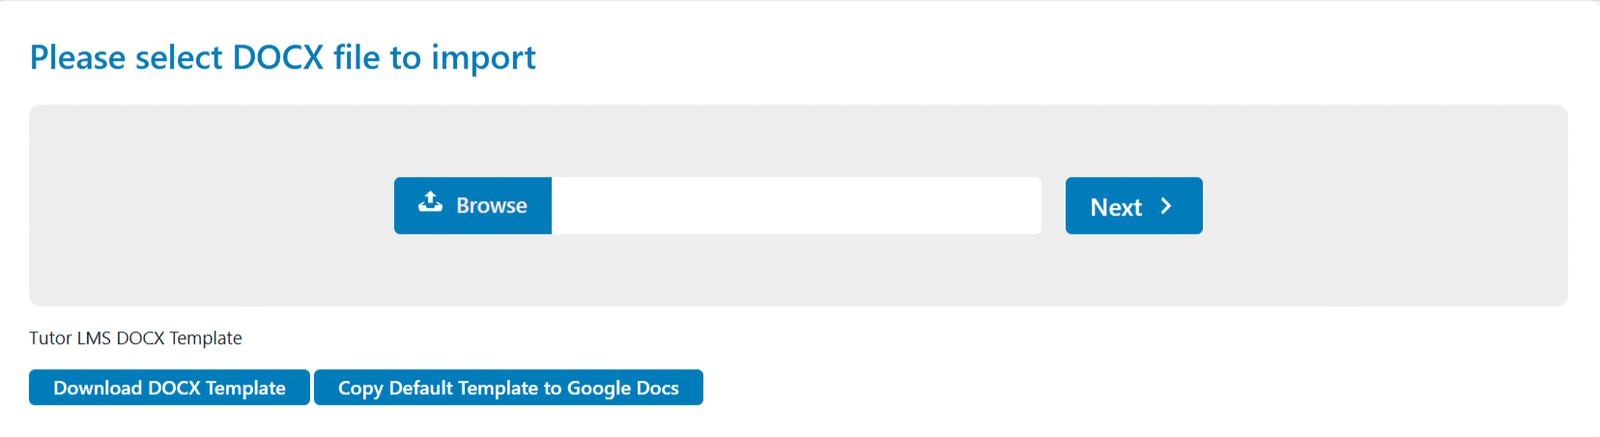
Similarly, to import a course from a docx file, navigate to the “Import DOCX” tab from the Course Import/Export menu located under the main TutorLMS menu. To complete the import, select the completed template’s .docx file and click on the Next button.
Note: Only a single course’s .docx file can be imported at once.
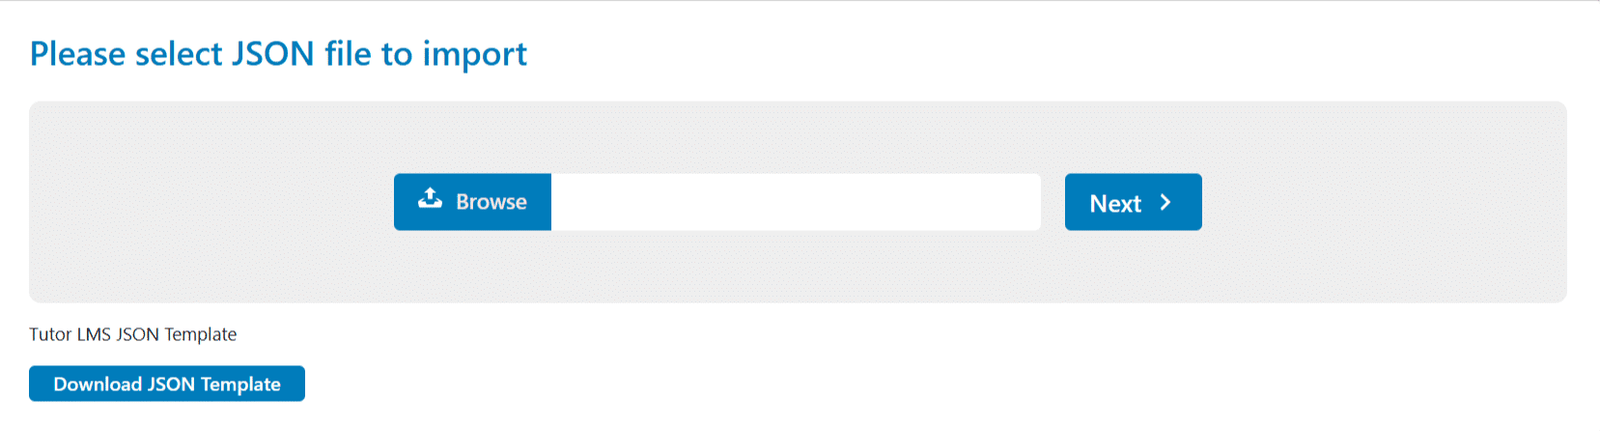
Similarly, to import a course from a JSON file, navigate to the “Import JSON” tab from the Course Import/Export menu located under the main TutorLMS menu. To complete the import, select the completed template’s .json file and click on the Next button.
Import Multiple Courses
You can import several courses at once using a single template file by adding multiple entries on the “Courses” sheet of the template. When importing lessons and topics, specify the course title they are assigned to in the “Course” column on the “Lessons” and “Topics” sheets.
Then, to complete the import process, go to the “Import Courses” tab from the course Import/Export menu located under the main TutorLMS plugin menu. Here, select your .xls or .xlsx file containing multiple courses and click on the “Next” button.
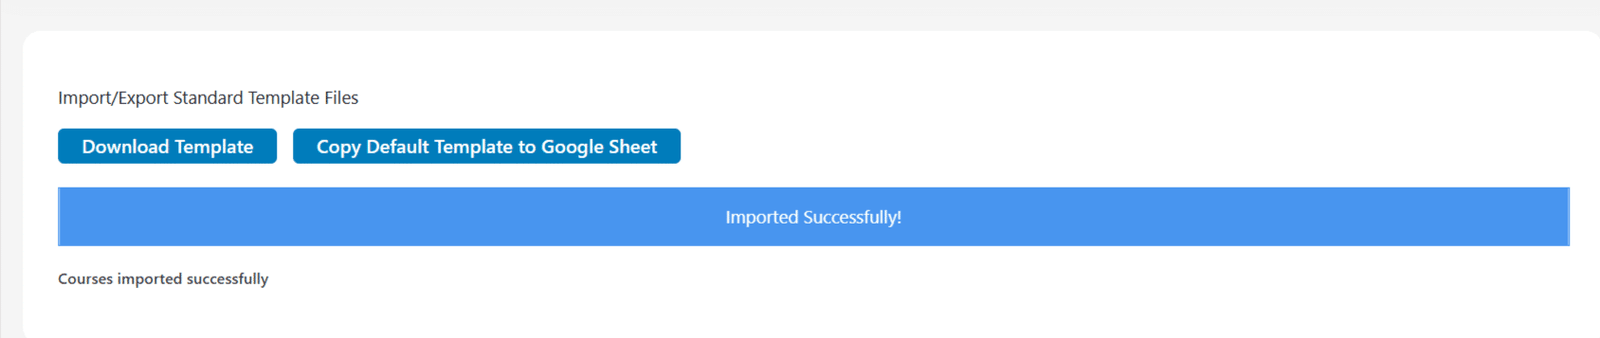
Similarly, you can import multiple courses at once using the JSON file in the “Import JSON” tab as well.
Settings
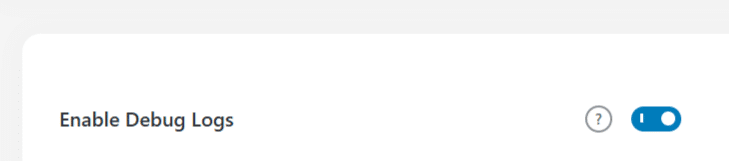
Enable Debug Logs
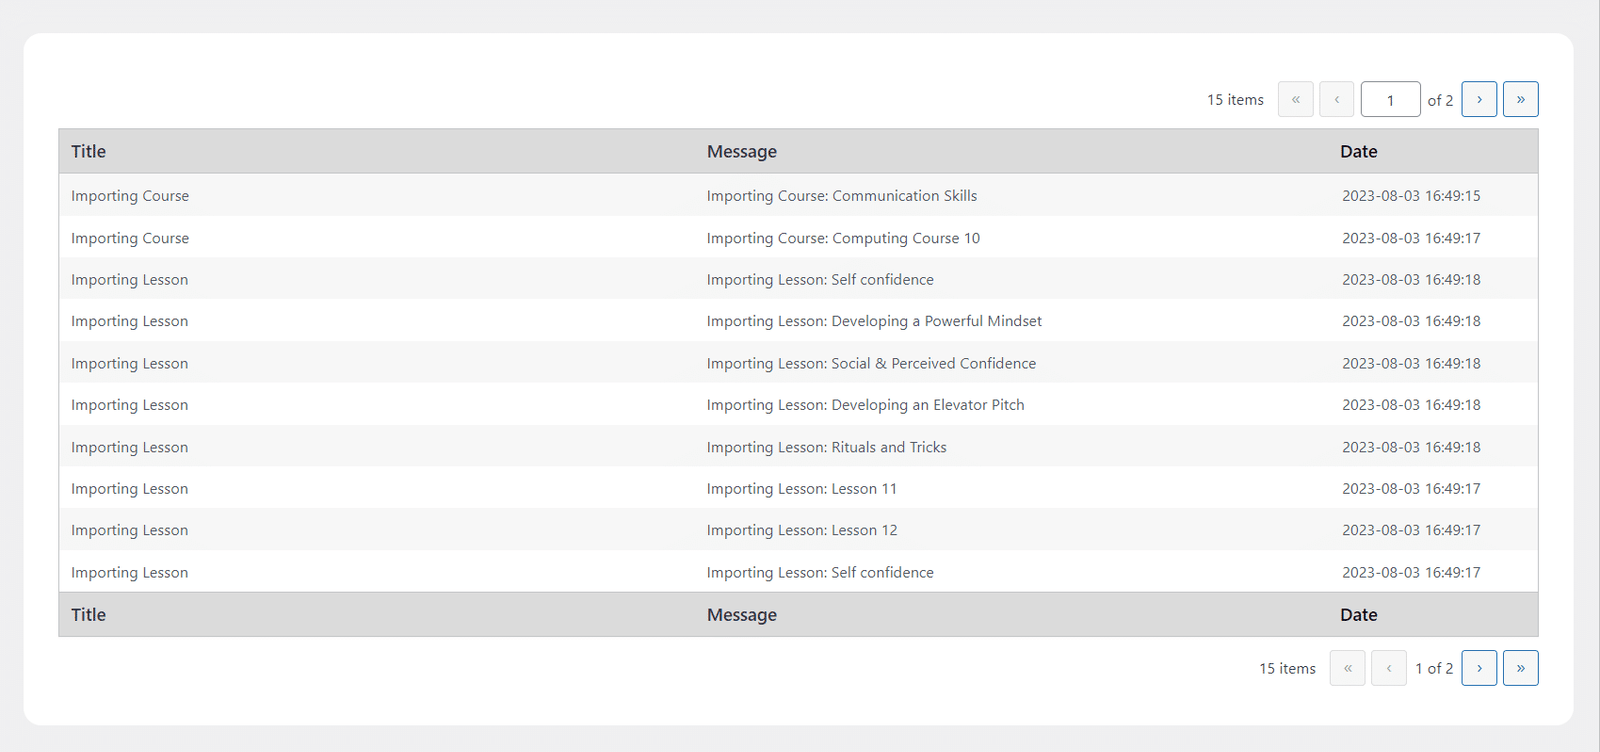
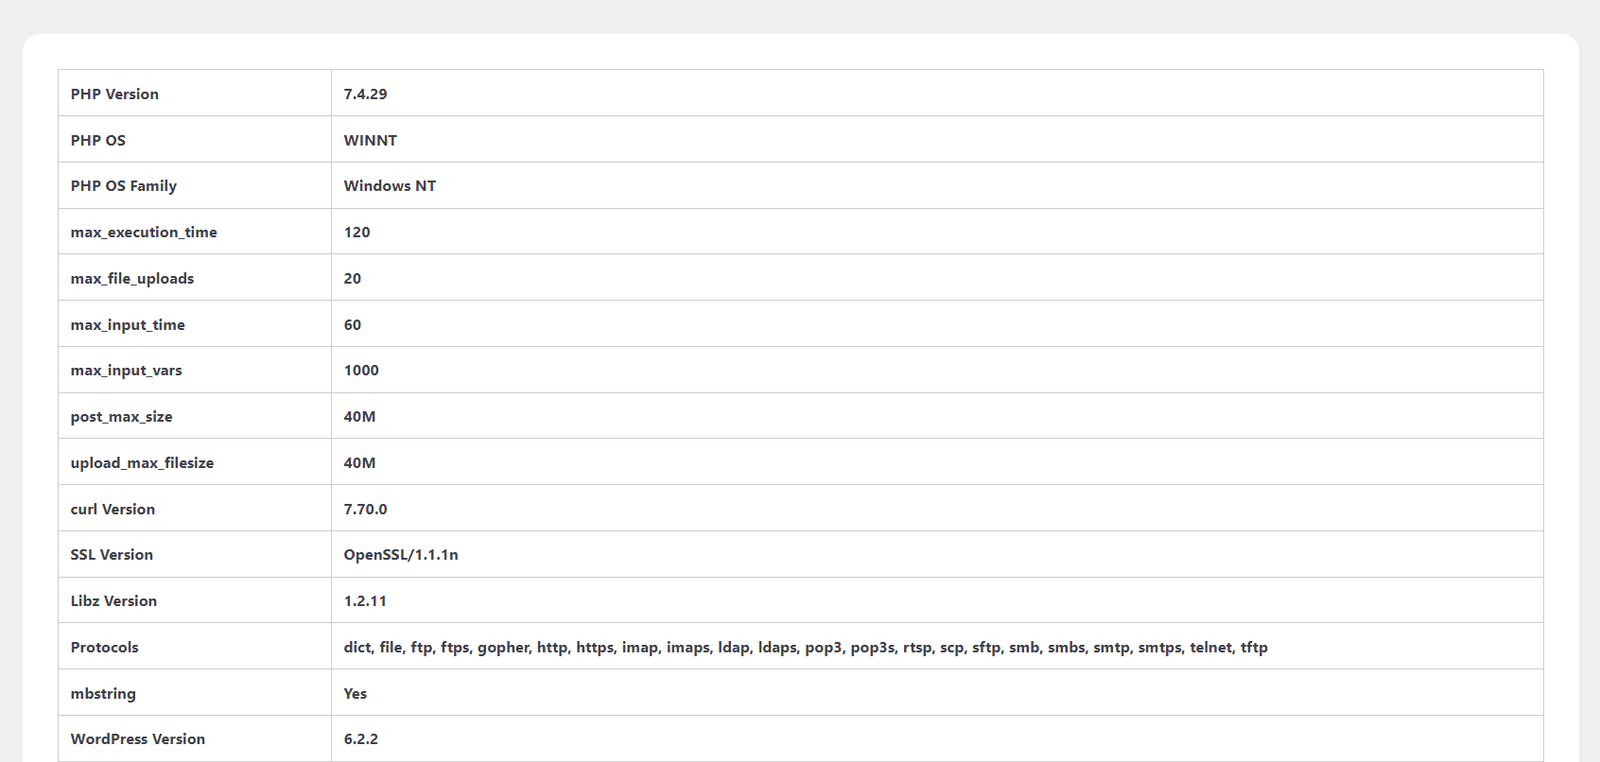
Enabling the “Enable Debug Logs” toggle in the settings tab enables the system to generate import debug logs, which provide valuable information and insights for troubleshooting potential import issues.
Once Debug logs are enabled, two new tabs will appear: “Debug logs” and “Systems Information“. The “Debug logs” tab displays detailed logs that provide a comprehensive overview of the import process, while the “System Information” tab showcases your system specifications.
Enable Activity Logs
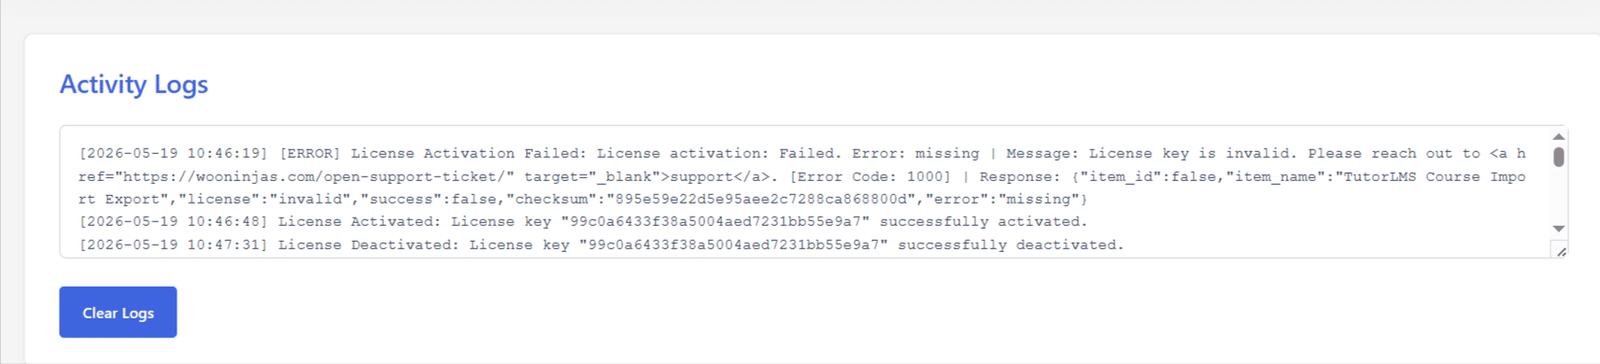
Enabling the “Enable Activity Logs” toggle in the settings tab to track plugin activities, such as license key validation. When this option is enabled, a new “Activity Logs” tab will become visible.

Enable Google Sheet Compatibility
Here, you can enable this option to import courses from a Google Sheet.
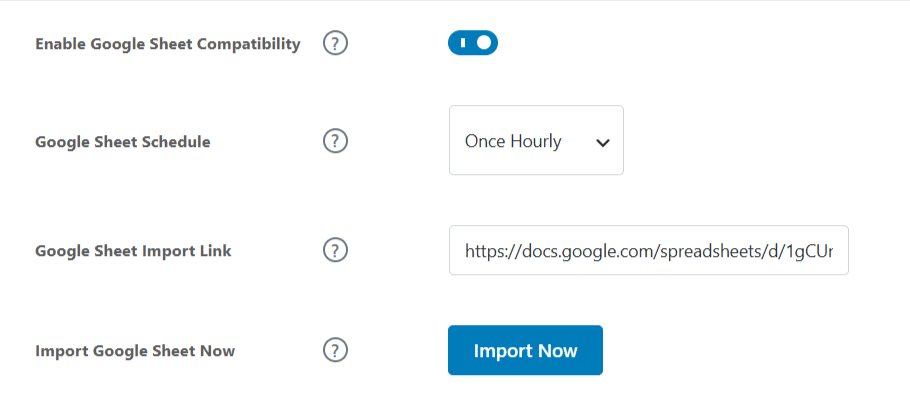
Google Sheet Schedule
Here, you can select the Google Sheet import schedule. Based on the interval, a cron job will run and create/update the TutorLMS courses, topics, and lessons based on the columns and records in the Excel sheet. You can select from the following options:
- Every minute
- Once Hourly
- Twice Daily
- Once Daily
- Once Weekly
Google Sheet Import
Here, you are supposed to provide the Google sheet import link from which you want to check and import/update the TutorLMS Course-related information. The URL link will be in the format:
“https://docs.google.com/spreadsheets/d/<your-spreadsheet-id>/edit?gid=<sheet-id> ”
To create your own TutorLMS Course Importing Google sheet, the steps are as follows:
1- Navigate to the “Import Courses” tab and click on the “Copy Default Template to Google Sheet” button. Here, you will be asked to make your own online copy of the course-importing Excel sheet into your Google account.
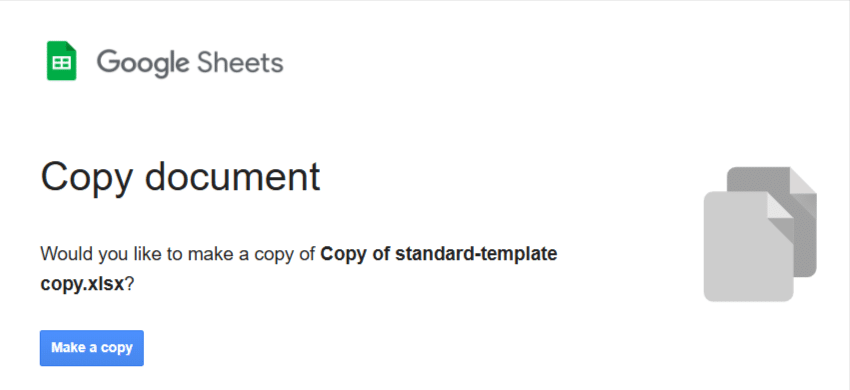
2- Finally, click the “Make a copy” button.
3- Once you have created your own course-importing Excel sheet. Click on the “Share” button. Provide restricted access to the Excel sheet with viewer role permissions.
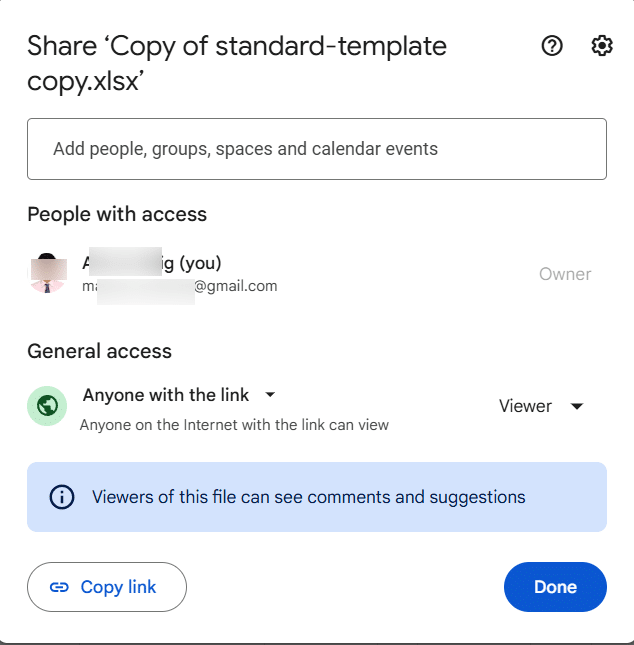
4- Click the “Copy link” button to copy the Excel sheet URL.
5- Finally, navigate back to the “Settings” tab and paste the Excel sheet URL in the “Google Sheet Import” option text field and click the “Update Settings” button.
Import Google Sheet Now
Here, you can click the “Import Now” button to manually run the Google Sheet import function to import/update course(s) from Google Sheet. After the function has been executed, your course-related information/content will be updated.
Important
- Do not add, delete, rename, or reorder any columns in the provided template.
- Leave unused fields blank.
- Ensure all data is mapped to the correct columns before importing.
- Modifying the template structure may cause the import to fail or produce unexpected results.
Enable Google Docs DOCX Compatibility
Here, you can enable this option to import a single course from a Google Doc.
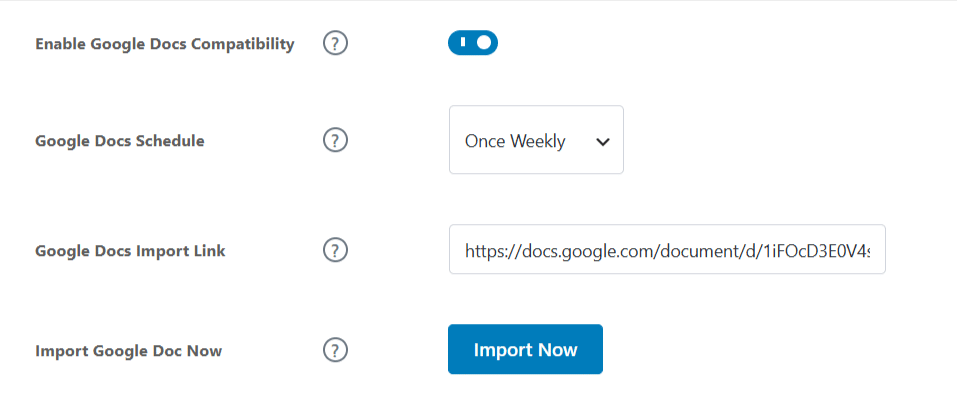
Google Docs Schedule
Here, you can select the Google Docs import schedule. Based on the interval, a cron job will run and create/update the respective TutorLMS course, its topics, and its lessons based on the content in the document. You can select from the following options:
- Every minute
- Once Hourly
- Twice Daily
- Once Daily
- Once Weekly
Google Docs Import Link
Here, you are supposed to provide the Google Docs import link from which you want to check and import/update the TutorLMS Course-related information. The URL link will be in the format:
https://docs.google.com/document/d/<your-document-id>/edit?tab=t.0
To create your own TutorLMS Course Importing Google Doc, the steps are as follows:
1- Navigate to the “Import DOCX” tab and click on the “Copy Default Template to Google Docs” button. Here, you will be asked to make your own online copy of the course-importing Google Doc into your Google account.
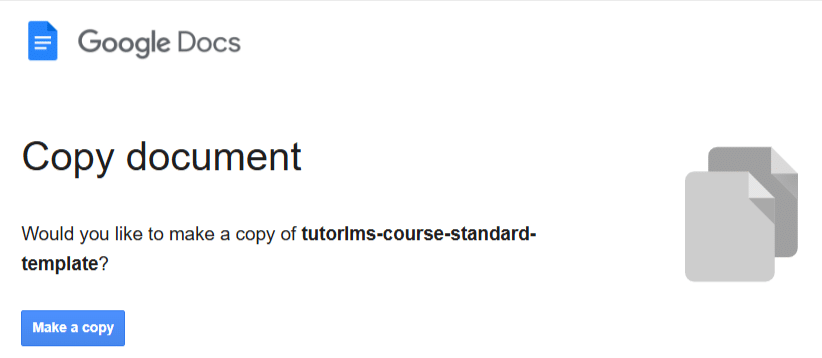
2- Finally, click the “Make a copy” button.
3- Once you have created your own course-importing Google Doc. Click on the “Share” button. Provide restricted access to the Google Doc with viewer role permissions.
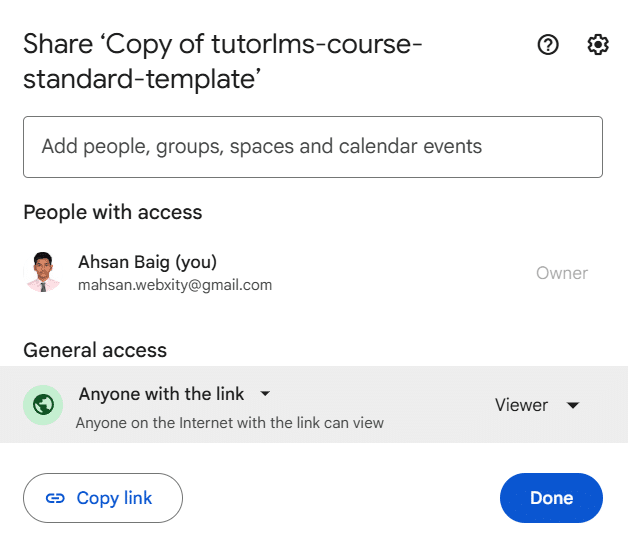
4- Click the “Copy link” button to copy the Google Doc URL.
5- Finally, navigate back to the “Settings” tab and paste the Google Doc URL in the “Google Docs Import Link” option text field and click the “Update Settings” button.
Import Google Doc Now
Here, you can click the “Import Now” button to manually run the Google Docs import function to import/update the respective course from Google Doc. After the function has been executed, your course-related information/content will be updated.
Shortcodes
Shortcode # 1
You can use the [tutorlms_course_import_export] to show a button on the frontend which will allow the users to download the course in a .docx template.
The shortcode works as follows:
1- The shortcode [tutorlms_course_import_export] has 4 attributes, of which the “course_id” attribute is a required/mandatory attribute to be included for the shortcode’s functionality to work.
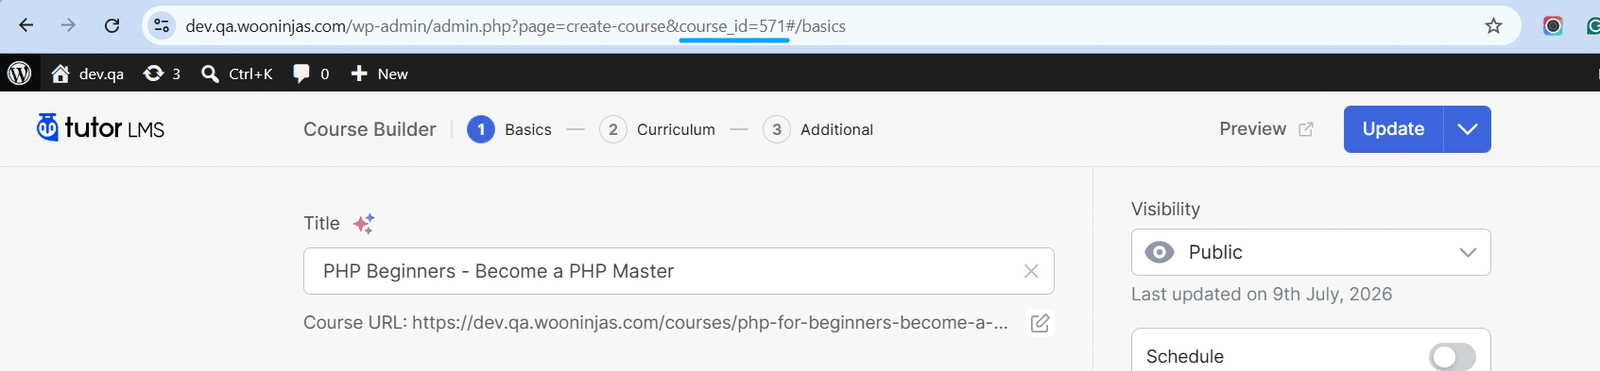
2- By default, the [tutorlms_course_import_export course_id=”123″] shortcode will only work/show for logged-in users.

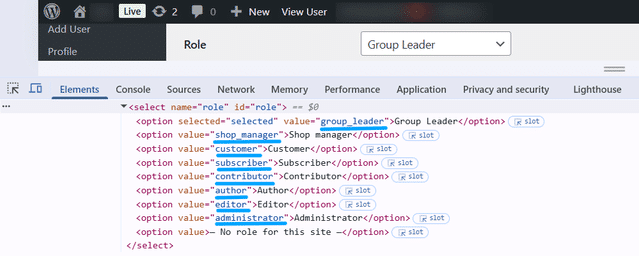
3- To allow multiple users of different user roles to access the shortcode functionality on the frontend, add multiple user roles in the “allowed_roles” attribute separated by a comma, like [tutorlms_course_import_export course_id=”123″ allowed_roles=”administrator,subscriber”]. This attribute is optional to use in the shortcode.
4- To get the value to enter for the “allowed_roles” attribute, navigate to the “Users” menu and open any profile to the “Role” field and inspect the dropdown to get the user role value to enter in the shortcode.
5- You can use the “docx_label” attribute to change the button text on the frontend pages, like [tutorlms_course_import_export course_id=”123″ allowed_roles=”administrator” docx_label=”Export Course”]. This attribute is optional to use in the shortcode.
6- You can use the “class” attribute to change the button CSS on the frontend pages, like [tutorlms_course_import_export course_id=”123″ allowed_roles=”administrator” docx_label=”Export Course” class=”my-custom-btn”]. This attribute is optional to use in the shortcode. You can add your custom CSS on the site using your theme customizer like:
.my-custom-btn{ background-color:red; }
Blocks
You can place the “TutorLMS Course Export” block on any page you want to allow the selected user roles to download the respective course in a .docx template from the frontend pages. It will work just like the “[tutorlms_course_import_export]” shortcode on the frontend.

TutorLMS Course Import/Export Template Guide (.xls, .xlsx files)
The TutorLMS Course Import/Export add-on uses a standard template to import and export courses, lessons, and topics. You can download the template file from the “Import Courses” tab.
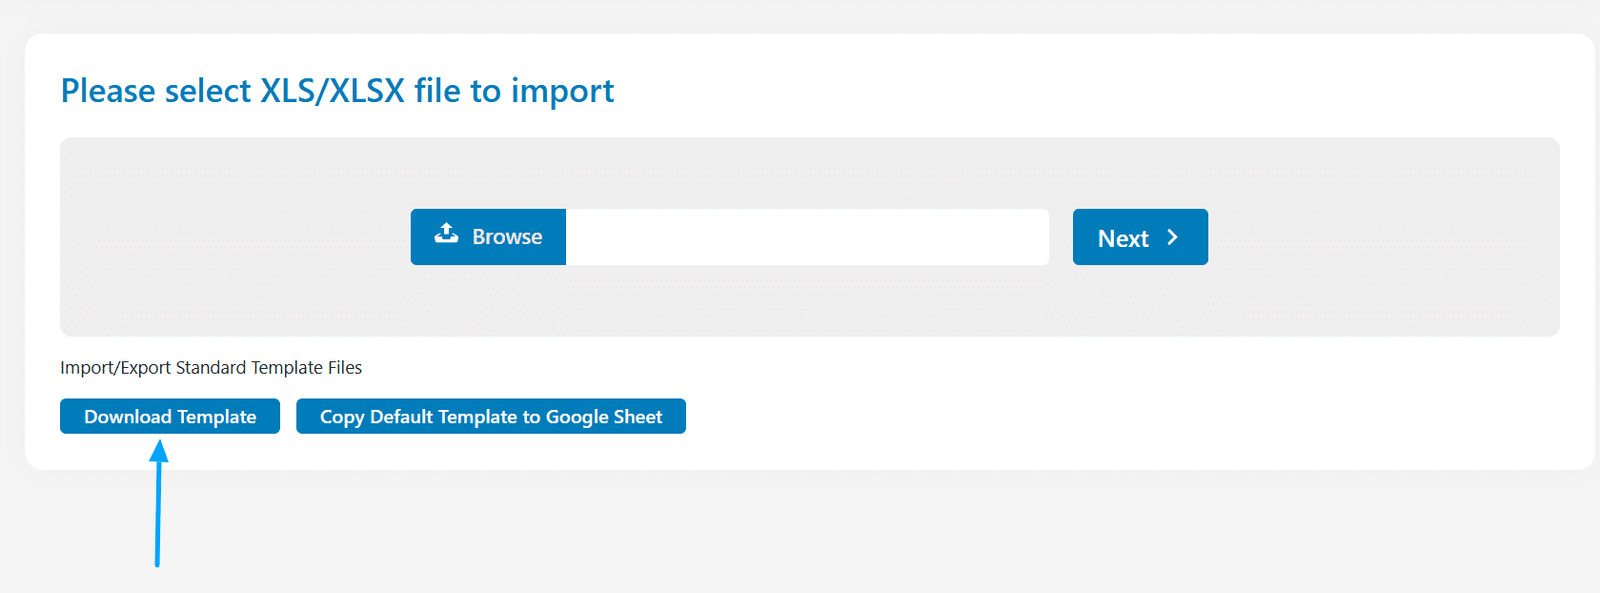
When exporting a course, its content is added to the corresponding fields on the spreadsheet file. Likewise, on import, the template should be filled with the necessary course content and settings, in the order and form outlined below;
“Course” Sheet
Type
The first column on the “Course” sheet is the “Type” column. This column is used to specify the type of content being imported. Content types options include: course, lesson, and topic.
In this sheet, this field should be set to “courses”.
Status
This column is used to specify the status of the course. You can use the following statuses:
- draft
- publish
- pending
- trash
- private
- future
Publish Date
This column is used to specify the published date of the respective course. It is provided in the following format:
2025-12-24 11:55:44
Password
This column is used to specify the password (in textual format) for the password-protected course(s).
Title
This column holds the title of the course.
Content
This column contains the content featured on the course description page.
Images, videos, and text can be included in the content using HTML tags. To do so, use <img> for the images, <p> for text, and <video> and for the videos.
Category
Here you can add the categories of the course.
Tag
Here you can add the tags of the course.
Sale Price
In this field, add the sale price of the course.
Price
In this field, add the price of the course.
Product ID
In this field, add the respective WooCommerce product ID of the course.
Monetize By
Here, you can enable monetization for the course. To set this, an e-commerce plugin should be installed, i.e, WooCommerce or Easy Digital Downloads, and you can add tutor, WC, or EDD in this field, respectively.
Certificate Template
Here you can specify the certificate template for the respective course. You can use the following options:
- none,
- default,
- template_1
- …. and so on
Attachments
Here, you can specify the attachments in the following format:
- a:2:{i:0;s:88:”http://[URL]/wp-content/uploads/2025/12/[File Name]”;i:1;s:88:”http://[URL]/wp-content/uploads/2025/12/[File Name]”;}
- a:1:{i:0;s:88:”[URL]l/wp-content/uploads/2025/12/[File Name]”;}
Prerequisites IDs
Here, you can specify the IDs of the Prerequisites course(s) of the respective course, separated by a comma.
Course Image
Here, add the link to the featured image of the course
Public Course
If you want to set the course to be open to the public, i.e., no enrollment will be required, then enter “yes” in this field. Otherwise, you can use “no” to disable the toggle.
Course Level
This column can have the following values corresponding to the TutorLMS course levels:
- All Levels (all_levels)
- Beginner (beginner)
- Intermediate (intermediate)
- Expert (expert)
Course Duration
Here you can set the total duration of the course.
Maximum Students
In this field, add the number of students who can enroll in this course. You can set 0 for no limits.
Enrollment Expiry
Here you can set whether to enable or disable the enrollment expiration feature. You can provide the information in the following format:
{“course_enrollment_period”:”no”,”enrollment_starts_at”:””,”enrollment_ends_at”:””,”pause_enrollment”:”no”}
Example:
{“course_enrollment_period”:”yes”,”enrollment_starts_at”:”2025-12-28 20:30:00″,”enrollment_ends_at”:””,”pause_enrollment”:”no”}
{“course_enrollment_period”:”yes”,”enrollment_starts_at”:”2025-12-28 19:30:00″,”enrollment_ends_at”:”2025-12-29 23:30:00″,”pause_enrollment”:”no”}
{“course_enrollment_period”:”yes”,”enrollment_starts_at”:”2025-12-28 19:30:00″,”enrollment_ends_at”:”2025-12-29 23:30:00″,”pause_enrollment”:”yes”}
Enable Question & Answers
To enable the questions & answers section for your course, enter “yes” in this field.
Course Material Includes
Here, you can add the list of assets you will be providing for the students in this course.
Course Target Audience
Specify the target audience that will benefit the most from this course.
Course Requirements
If this course has any requirements, then mention them in this field.
Course Benefits
Mention the benefits of the course, i.e., what students will learn in this course.
Course Video
If the course has any videos, then you can add them here. It supports the following video sources:
- HTML 5 (mp4)
- External URL
- Youtube
- Vimeo
- Embedded
- Shortcode
You can alter the display by setting different parameters
a:9:{s:6:”source”;s:7:”youtube”;s:15:”source_video_id”;s:0:””;s:6:”poster”;s:0:””;s:19:”source_external_url”;s:0:””;s:16:”source_shortcode”;s:0:””;s:14:”source_youtube”;s:43:”https://www.youtube.com/watch?v=V2K4VqkfRaM”;s:12:”source_vimeo”;s:0:””;s:15:”source_embedded”;s:0:””;s:7:”runtime”;a:3:{s:5:”hours”;s:2:”02″;s:7:”minutes”;s:2:”30″;s:7:”seconds”;s:2:”00″;}}
Parameters
- Source: You can add the source here, i.e., HTML 5, External URL, YouTube, Vimeo, Embedded, or Shortcode
- Source_video_id: Add the video ID
- Poster: Add the Thumbnail
- Source_external_url: Add the external URL of the video
- Source_shortcode: Add the shortcode of the video
- Source_youtube: Add the link to the youtube video
- Source_vimeo: Add the link to the Vimeo video
- Source_embedded: Add the link of the embedded video
- Hours: Add the duration (hours) of the video
- Minutes: Add the minutes duration of video
- Seconds: Add the seconds duration of the video
“Topics” Sheet
Type
The first column on the “Topics” sheet is the “Type” column. This column is used to specify the type of content being imported. Content types options include: course, lesson, and topic.
In this sheet, this field should be set to “topic”.
Title
This column will hold the title of the topic.
Content
This column contains the topic’s content.
Images, videos, and text can be included in the content using HTML tags. To do so, use <img> for the images, <p> for text, and <video> and for the videos.
Associated Course
This column represents the course to which this topic is attached.
“Lessons” Sheet
Type
The first column on the “Lesson” sheet is the “Type” column. This column is used to specify the type of content being imported. Content types options include: course, lesson, and topic.
In this sheet, this field should be set to “lesson”.
Title
This column holds the title of the lesson.
Content
This column contains the lesson’s content.
Images, videos, and text can be included in the content using HTML tags. To do so, use <img> for the images, <p> for text, and <video> and for the videos.
Lesson Image
Here you can add the featured image of the lesson. Simply add the link of the featured image in this column.
Lesson Video
If the lesson has any video, then you can add it here. It supports the following video sources:
- HTML 5 (mp4)
- External URL
- Youtube
- Vimeo
- Embedded
- Shortcode
You can alter the list displayed by setting different parameters
a:9:{s:6:”source”;s:7:”youtube”;s:15:”source_video_id”;s:0:””;s:6:”poster”;s:0:””;s:19:”source_external_url”;s:0:””;s:16:”source_shortcode”;s:0:””;s:14:”source_youtube”;s:43:”https://www.youtube.com/watch?v=V2K4VqkfRaM”;s:12:”source_vimeo”;s:0:””;s:15:”source_embedded”;s:0:””;s:7:”runtime”;a:3:{s:5:”hours”;s:2:”02″;s:7:”minutes”;s:2:”30″;s:7:”seconds”;s:2:”00″;}}
Parameters
- Source: You can add the source here, i.e., HTML 5, External URL, YouTube, Vimeo, Embedded, or Shortcode
- Source_video_id: Add the video ID
- Poster: Add the Thumbnail
- Source_external_url: Add the external URL of the video
- Source_shortcode: Add the shortcode of the video
- Source_youtube: Add the link to the YouTube video
- Source_vimeo: Add the link to the Vimeo video
- Source_embedded: Add the link of the embedded video
- Hours: Add the duration (hours) of the video
- Minutes: Add the minutes duration of the video
- Seconds: Add the seconds duration of the video
Lesson Attachment
Here, you can add the link to the attachments you want to share within the lesson.
Associated Topics
This column holds the title of the topic in which the lesson will be placed.
Preview
This column is used to specify whether the lesson is available to preview or not. You can use “1” to enable the toggle or use “0” or leave the cell empty to disable the toggle.
TutorLMS Course Import/Export Template Guide (.docx file)
To create a docx file from scratch, the steps are as follows:
1- On the starting line of the docx file, write the “[TLCIE_COURSE]” shortcode (to indicate that the course’s name is on the next line) and in the next line provide the course’s name.
2- In the next line, write the “[TLCIE_FEATURED_IMAGE]” shortcode (to indicate that the course’s Featured Image is on the next line) and in the next line provide the course’s Featured Image.
3- In the next line, you can provide the content for the course page (course’s description).
4- In the next line, write the “[TLCIE_INTRO_VIDEO]” shortcode (to indicate that the course’s Intro Video’s link is on the next line) and in the next line provide the course’s Intro Video’s link (example: https://www.youtube.com/watch?v=V2K4VqkfRaM ).
5-Once you have provided the content for the course page, in the next line write the “[TLCIE_TOPIC]” shortcode (to indicate that the topic’s name is on the next line) and in the next line provide the topic’s name.
6- In the next line, you can provide the content for the topic’s summary.
7-Once you have provided the content for the topic’s summary, in the next line, write the “[TLCIE_LESSON]” shortcode (to indicate that the lesson’s name is on the next line) and in the next line provide the lesson’s name.
8- In the next line, write the “[TLCIE_FEATURED_IMAGE]” shortcode (to indicate that the lesson’s Featured Image is on the next line) and in the next line provide the lesson’s Featured Image.
9- In the next line, you can provide the content for the lesson page.
10- In the next line, write the “[TLCIE_INTRO_VIDEO]” shortcode (to indicate that the lesson’s video link is on the next line) and in the next line provide the lesson’s video link (example: https://www.youtube.com/watch?v=V2K4VqkfRaM ).
11- If you have multiple lessons under the topic, then repeat steps 7 to 10 again and again in order.
12- If you want to enter the next topic’s information, then repeat steps 5,6 in order.
The course’s topics and lessons will be imported in the top-to-bottom order. Hence, place the respective topics in the correct order; the topic at the top (starting from the “[TLCIE_TOPIC]” shortcode) will be the first topic, and the lessons under that topic will be its lessons. When the next “[TLCIE_TOPIC]” shortcode is placed with its name, all the lessons coming underneath the second topic will be linked to it, and so on.
Note: If you want to export the course’s content along with its settings, then we recommend you use the Excel file template to import/export your courses.
FAQ’s
1. Which Excel extension does this add-on support?
This add-on supports the .xls and .xlsx file extensions.
2. Where can I find the standard XLS template?
The plugin zip file includes a standard XLS template for import, located at > tutorlms-course-import-export > sample-import-files.
3. Can we also import/export quizzes with this addon?
No, to import/export quizzes, we have the “TutorLMS Quiz Import/Export” addon.
4. Can I export lessons and topics without exporting an entire course?
Currently, the add-on only supports exports for complete courses.
5. Can I import or export multiple courses at a time?
Yes, the add-on supports imports and exports for multiple courses.
6. If a course, lesson, or topic has text, images, and a video lesson, how are these added to the spreadsheet, and how would one control formatting/appearance?
Images and videos can be added using HTML tags. <img> for the images, <p> for text and <video> and for the videos. By using these tags, you can add images and videos along with the text.
7. I’ve successfully imported the course, but after importing, its price is not reflected. What should I do?
Make sure the EDD or WooCommerce product is created before importing the courses. After importing, you have to edit that course, select the WooCommerce/ EDD product from the dropdown, and click on Update. This will start reflecting the course price.
8. Should I delete a course from the trash as well before importing it again?
Yes, if there is an existing course that is in the trash, then it needs to be deleted from the site before importing the same course.
9. How does your addon handle the order of Courses, Topics and lessons? Can You Provide An Example Of How This Works?
Our addon maintains the order in which Courses, Topics and Lessons are created, irrespective of how they are structured in the course builder. For example, if Topic 2 is created before Topic 1 on your website, the export sequence will be Topic 2 followed by Topic 1.
10. Why do you recommend admins that they should review their content before importing it to a second site?
We recommend admins that they should review their content before importing for a specific reason. The content export order is determined by the creation order, not the order in the course builder. By doing this review, it ensures that admins are well-informed about the content sequence and how it will be imported into the second site.
11. Can we rearrange the Topics in a specific order?
Certainly! You have the flexibility to arrange Topics in your preferred order by manually moving them up or down within the exported sheet before you begin the import process.
12. How can we easily identify the order of Topics?
You can identify the order by examining the “ID” column in the export file, which provides a clear reference for each topic’s position.
Changelogs
1.6.1
- Fix: Fixed logs to generate logs properly on every action performed on our addon (like Import and Export).
- Fix: Fixed Docx template file not found issue.
1.6.0
- New: Added JSON Export button on export courses page to export courses in JSON format.
- New: Added dedicated JSON Import tab to import courses in JSON format.
- New: Added Google Docs Import compatibility to import courses automatically directly from Google Docs file on selected schedule.
- Fix: Resolved security vulnerabilities and enhanced overall performance.
1.5.1
- Fix: Resolved security vulnerabilities and enhanced overall performance.
1.5.0
- New: Added a dedicated DOCX course import screen, separating the Excel and DOCX import workflows.
- New: Added per-course and bulk XLS, XLSX, and DOCX export actions to the Courses admin screen.
- New: Added a role-aware front-end DOCX export shortcode and Gutenberg block.
- Fix: Ensured imported video metadata includes the source video ID to prevent lesson-page warnings.
- Fix: Improved plugin dependency handling when Tutor LMS is unavailable.
1.4.0
- New: Added Docx Export Import Compatibility.
1.3.4
- Fix: Updated the Google Sheets template link.
- Fix: Sanitized the rendered license notice markup.
1.3.3
- Fix: Improved Licensing Module.
1.3.2
- Fix: Fixed google sheet not copying issue.
1.3.1
- Fix – Resolved security vulnerabilities and enhanced overall performance.
1.3.0
- New – Added Google Sheet Import Compatibility.
1.2.1
- Fix – Resolved a compatibility issue between Php Spreadsheet and PHP 7.4.
1.2.0
- Fix – Fixed Compatibility issues with latest course builder.
1.1.0
- New – Implemented batch processing to import large courses.
- Fix – Fixed the issue of order changing during export.
1.0.5
- New – Added an option of courses per page in screen options.
1.0.4
- Fix – Minor issues related to events loggers.
- New – Export all courses feature added in the exports tab.
1.0.3
- Fix – Issue related to importing identical courses.
- Fix – Problem with the import of the “Course Level” course meta field.
1.0.2
- Fix – Solved problems with course meta fields letter case during import.
- New – Updated the plugin’s user interface for a better user experience.
- New – Implemented a logging system to track activities within the addon.
1.0.1
- Fix – Minor warnings issue in export tab.
- Fix – Association of Topics and Lessons on Course import.
1.0.0
- Initial release.
